|
Size: 4587
Comment:
|
Size: 4587
Comment:
|
| Deletions are marked like this. | Additions are marked like this. |
| Line 70: | Line 70: |
| [[attachment:gazebo-pr2.png]] | {{attachment:gazebo-pr2.png}} |
| Note: This tutorial assumes that you have completed the previous tutorials: Writing a realtime controller, Starting Gazebo, Adding Objects To The World, Teleop Arm Using move_arm. |
| |
Incrementally develop and test a controller in simulation.
Description: This tutorial walks you through the process of creating s simple custom controller, incrementally adding functionality to it and testing each step in simulation.Tutorial Level: INTERMEDIATE
![]() work in progress
work in progress
Contents
Get Gazebo Up and Running
Make sure you complete StartingGazebo before continuing. The AddingObjectsToTheWorld and TeleopArmKeyboard tutorials will provide you with further insights into what is going on.
Create Appropriate Launch Files
In order to make the cycle of development and testing easier, we create two launch files, one for starting up Gazebo with a robot in it, and one for spawning the controller we are testing.
Launch file for Gazebo
This is essentially copy-pasted from two laucnh files referenced in the Gazebo tutorials:
 $ cat `rospack find gazebo`/launch/empty_world.launch
 $ cat `rospack find pr2_gazebo`/pr2.launch
...so if it does not work as expected you should have a look there to see if things have changed since.
create start_pr2_gazebo.launch like this:
<launch>
  <!-- launch gazebo with empty world -->
  <param name="/use_sim_time" value="true" />
  <node name="gazebo" pkg="gazebo" type="gazebo" args="$(find gazebo_worlds)/worlds/empty.world" respawn="false" >
    <env name="LD_LIBRARY_PATH"
         value="$(find pr2_gazebo_plugins)/lib:$(find gazebo)/gazebo/lib:$(optenv LD_LIBRARY_PATH)" />
    <env name="GAZEBO_RESOURCE_PATH"
         value="$(find pr2_ogre):$(find ikea_ogre):$(find gazebo_worlds):$(find gazebo)/gazebo/share/gazebo" />
    <env name="OGRE_RESOURCE_PATH" value="$(find ogre)/ogre/lib/OGRE" />
  </node>

  <!-- spawn PR2 -->
  <include file="$(find pr2_defs)/launch/upload_pr2.launch" />
  <node pkg="gazebo_tools" type="urdf2factory" args="robot_description" respawn="false" output="screen" />
  <node pkg="robot_state_publisher" type="state_publisher" name="robot_state_publisher" output="screen">
    <param name="publish_frequency" type="double" value="50.0" />
    <param name="tf_prefix" type="string" value="" />
  </node>
</launch>
start Gazebo using roslaunch
$ roslaunch start_pr2_gazebo.launch
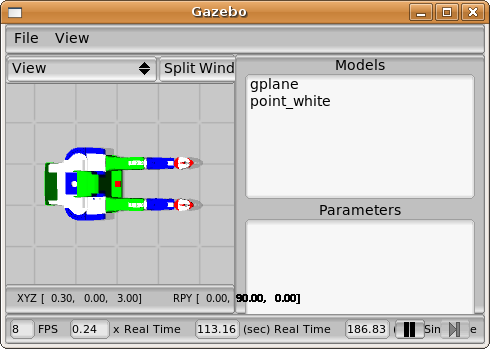
you should see something like this

Launch files for your controller
Looking at an example for inspiration:
$ cat `rospack find pr2_arm_gazebo`/controllers/l_arm_position_controller.launch
we see that
we define which controller to run on which joint using a YAML file that gets loaded onto the ROS parameter server
we use the spawner.py script from pr2_mechanism_control and give it a list of controllers to launch
create a simple test.yaml file that specifies a single controller of type TutorialController:
controller_tutorial:
  type: TutorialController
create a simple test.launch file that loads the test.yaml file and spawns a controller_tutorial:
<launch>
  <rosparam file="$(find controller_tutorial)/test.yaml" command="load" />
  <node
      pkg="pr2_mechanism_control"
      type="spawner.py"
      name="controller_tutorial"
      args="controller_tutorial"
      output="screen">
  </node>
</launch>
- start your controller using roslaunch:
$ roslaunch test.launch
Note that any console output from your controller will appear in the terminal where you started Gazebo, not the one where you just launched your controller.


