| Note: The following tutorial was designed for the Electric distribution of ROS and will not work with Diamondback.. This tutorial assumes that you have completed the previous tutorials: Running the Arm Navigation Wizard. |
| |
Planning Components Visualizer
Description: This tutorial explains the planning components visualizer in the move_arm package, and how it may be used to interact with a robot.Keywords: planning visualizer move arm ros navigation rviz electric
Tutorial Level: INTERMEDIATE
Next Tutorial: Warehouse Viewer
Contents
Introduction
This tutorial introduces you to the Planning Components Visualizer, which is a tool for interacting with your robot, solving inverse kinematics, and dynamically creating plans. In addition, the visualizer is a tool for validating the URDF, collision models, and planning configuration of your robot - essentially making sure that all the components of the arm navigation system are in order and functioning properly.
Prerequisites
In order to run the visualizer, you must have first generated an arm navigation package for your robot using the planning description configuration wizard. This package should be in the $ROS_PACKAGE_PATH environment variable, and should be called <your_robot_name>_arm_navigation. You must also have Rviz installed.
Launching The Visualizer
To launch the visualizer, open a terminal and type the following command:
roslaunch <your_robot_name>_arm_navigation planning_components_visualizer.launch
This will launch the requisite arm_navigation components (inverse kinematics, planner, trajectory filter, and environment_server) as well as launching Rviz with the proper configuration.
Components of the Visualizer
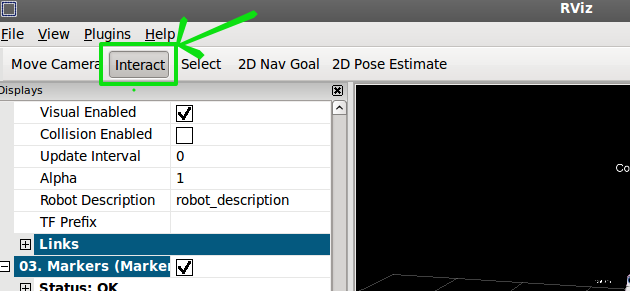
The Planning Components Visualizer uses interactive markers for user input. To use interactive markers, press the button on the top of the Rviz window which says "Interact." When you do this, a set of markers will appear on and on top of your robot that you can interact with.
Top Level Menu
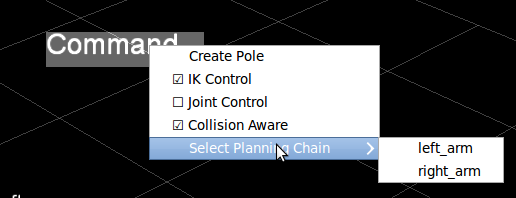
The top level menu is a selectable text label floating above your robot ("Command...") right click on the top level menu to access its capabilities. The top level menu has the following options:
Create Pole: This option will create a collision pole a few meters from the robot. This pole can be moved around the environment, selected, and deselected as desired. Collision poles are explained in a later section.
IK Control: when selected, IK (Inverse Kinematics) control option creates an interactive, posable marker at the end effector of the selected planning group. Planning groups and IK control are explained in a later section.
Joint Control: when selected, the Joint Control option allows you to manually pose each degree of freedom in the selected planning group of your robot. Planning groups and joint control are explained in a later section.
Collision Aware: when selected, the Collision Aware option tells the IK solver to consider self collisions and environmental collisions before generating IK solutions. The IK solver is discussed in a later section.
Select Planning Chain: This submenu allows you to select one of the planning groups in your robot. Planning groups are discussed in a later section.
End Effector Control
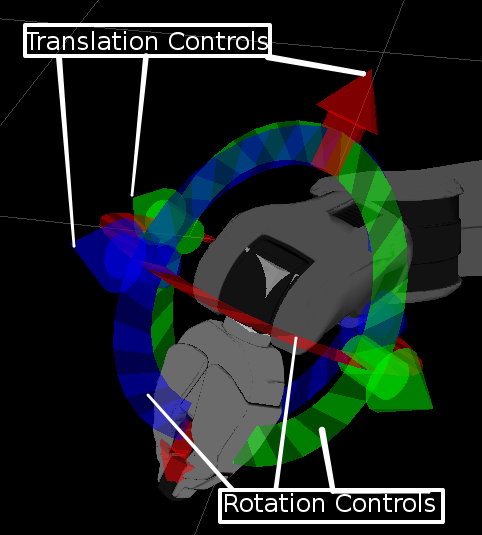
The end effector control is an interactive marker that allows you to perform IK control on the end effector of the selected planning group, plan with the selected planning group, filter trajectories, and so on. To pose the end effector while IK control is active, rotate or slide the interactive marker around using the interactive marker. If an IK solution exists, the robot model will be posed to that solution.
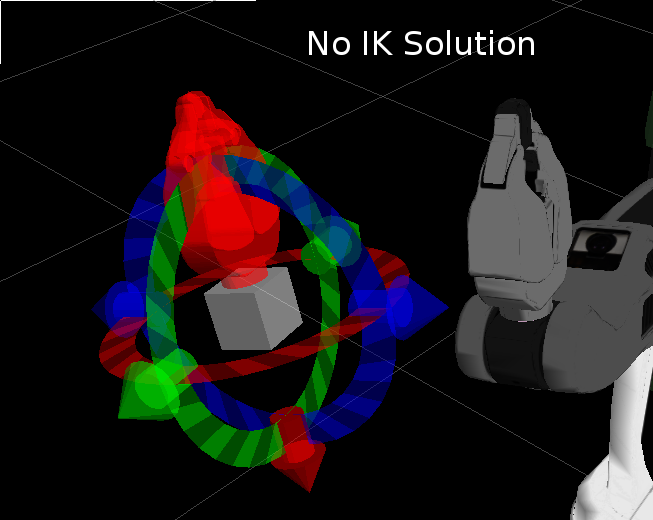
Otherwise, the end effector of the robot model will turn red, and no IK solution will be produced.
Right clicking on one of the controls on the end effector will open up the end effector menu.
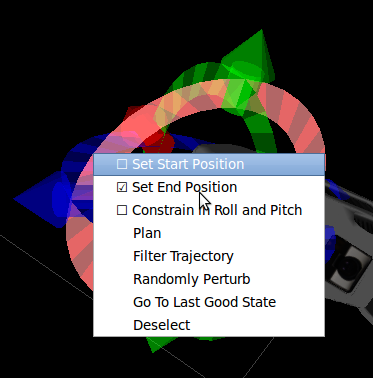
The end effector menu has the following options:
Set Start Position: When this box is checked, the currently active state is the starting position of a plan for the robot. The active state of the robot is the one which can be interacted with by using the interactive markers. The inactive state is represented as a ghosted representation of the planning group. The OMPL planner will plan between the start position and the end position.
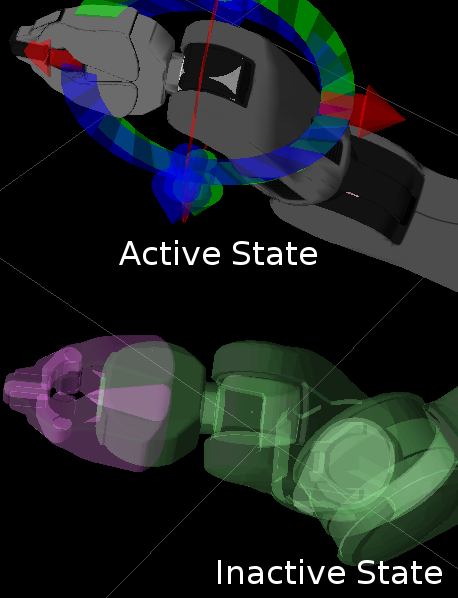
Set End Position: Same as Set Start Position, but sets the active state of the robot to be the end position of plans, rather than the start position of plans.
Contrain In Pitch and Roll: when this option is checked, the IK solver and planner will attempt to maintain the current pitch and roll of the end effector. (This may reduce the success rate of plans and will drastically reduce the number of valid IK solutions).
Plan: The OMPL planner will attempt to plan between the start state and end state of the planning group, and will display a valid, unfiltered and collision-free trajectory. If no plan can be found, this button will do nothing. Note that the trajectory displayed is likely to be quite jerky and unreasonable. This is because OMPL is a randomized, general planner that is not garunteed to produce smooth trajectories.
Filter Trajectory: Once a trajectory has been produced by the "plan" option, you may call "Filter Trajectory" to run a spline-smoothing trajectory filter on the trajectory. This will return a much smoother trajectory and display it.
Randomly Perturb: Press this button to sample a random position and orientation around the end effector. If a collision-free IK solution is found in 10 iterations, the end effector is placed there. This tool can be used to asses the reachability space of your robot.
Go to Last Good State: If your end effector control is in an unreachable position, this button will take you back to the last IK solution found by the solver.
Deselect: Turns of IK control for this planning group.
Joint Control
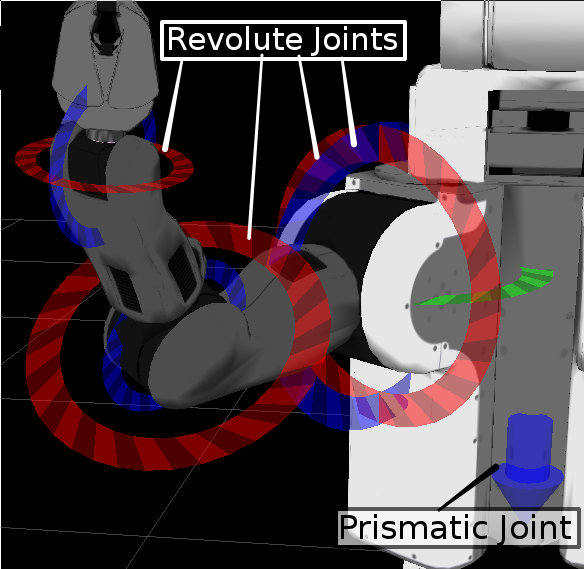
When Joint Control is active, you can directly control the state of joints in the selected planning group. Drag the rotational controls around to set the position of revolute joints, and drag axis controls up and down to control prismatic joints. Joints will obey their limits when you do this.
Collision Poles
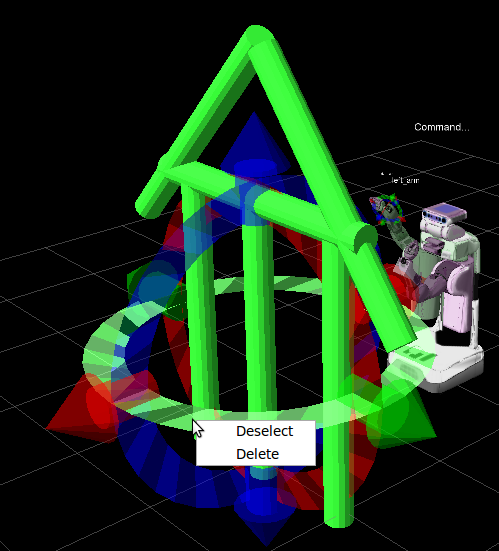
Collision poles can be created by going to the top level menu and selecting "Create Pole." When you do this, a large green pole will be spawned a few meters away from your robot. To select the pole, simply click on it. Once selected, the pole can be oriented arbitrarily. By right clicking on one of the controls attached to the pole, you may de-select or delete it. Moving the poles will cause the planning environment to be reset (this includes start and end poses for the robot). The IK solver and the OMPL planner will both automatically avoid any poles you place in the environment.


