| |
Add Kinect camera frame to the PR2 urdf tree
Description: This tutorial teaches you how to use the camera_pose_urdf_updater package to add the Kinect camera frame as a child into an existed (also already calibrated) PR2 urdf tree.Tutorial Level: BEGINNER
Next Tutorial: Calibrate camera pose to the map frame
The scenario
A Kinect is rigidly attached to the left side plate of the PR2 (shown below). The PR2 itself has already been calibrated. We want to find out the transformation between the Kinect camera frame and the left side plate frame and include that information into the PR2's urdf description.
Before you start
Before we can start, we have to do something to make the Kinect happy.
First we need to modify the Kinect camera launch file. From your computer, ssh to PR2 computer, bring up the robot, then
$ roscd openni_camera_unstable/launch
$ cp openni.launch /tmp/modified-openni.launch
Then open modified-openni.launch with your favorite text editor and delete the following lines close to the end:
  <!-- Load reasonable defaults for the relative pose between cameras -->
  <include file="$(find openni_camera_unstable)/launch/kinect_frames.launch">
    <arg name="camera" value="$(arg camera)" />
  </include>
Optionally, you can change the default name of the Kinect camera:
Change the line
<arg name="camera" default="camera" />
to
<arg name="camera" default="MS_Kinect" />
Save and quit. Then on PR2, launch the Kinect camera
$ cd /tmp
$ roslaunch modified-openni.launch
If you see the following information:
...
[ INFO] [1311014031.589879153]: rgb_frame_id = '/MS_Kinect_rgb_optical_frame'
[ INFO] [1311014031.589951662]: depth_frame_id = '/MS_Kinect_depth_optical_frame'
[ INFO] [1311014031.595511981]: camera calibration URL: file:///tmp/calibration_rgb_B00362705062045B.yaml
[ERROR] [1311014031.595687822]: Unable to open camera calibration file [/tmp/calibration_rgb_B00362705062045B.yaml]
[ WARN] [1311014031.595765604]: Camera calibration file /tmp/calibration_rgb_B00362705062045B.yaml not found.
[ WARN] [1311014031.595831560]: Failed to load RGB camera calibration, using default parameters
[ INFO] [1311014031.596839991]: camera calibration URL: file:///tmp/calibration_depth_B00362705062045B.yaml
[ERROR] [1311014031.596925400]: Unable to open camera calibration file [/tmp/calibration_depth_B00362705062045B.yaml]
[ WARN] [1311014031.596979722]: Camera calibration file /tmp/calibration_depth_B00362705062045B.yaml not found.
[ WARN] [1311014031.597030653]: Failed to load IR camera calibration, using default parameters
...
That means the Kinect camera has not been intrinsically calibrated. The Kinect camera must be intrinsically calibrated before we proceed. For Kinect camera intrinsics calibration details, see openni_camera/calibration.
When you are doing the intrinsics calibration for the Kinect camera, make sure the Kinect camera has already been launched. And there is also no need to change rgb_camera_info_url and depth_camera_info_url.
There are some tips that might help when you are calibrating the intrinsics for the IR camera:
Tip 1 If you calibrate the IR camera after calibrating RGB camera, remember to shut down all the programs that subscribe to RGB related topics. Otherwise you are likely to receive the following error message:
[ERROR] [1311024130.422472765]: Cannot stream RGB and IR at the same time. Streaming RGB only.
Tip 2 The following command listed in openni_camera/calibration Section 1.2 Depth only:
$ rosrun camera_calibration cameracalibrator.py --size 8x6 --square 0.108 image:=/camera/ir/image camera:=/camera/ir
will NOT bring up the calibration window, try the following line
$ rosrun camera_calibration cameracalibrator.py --size 8x6 --square 0.108 image:=/camera/ir/image_raw camera:=/camera/ir
Tip 3 After you bring up the intrinsics calibration window, if you are using the IR projector as your IR light source, and find out that the IR projector only illuminates every a few seconds, type
$ rosrun image_view image_view image:=MS_Kinect/depth/image_raw
This should make the IR projector stay on.
After you have done all above, re-launch the Kinect camera, and there is one last thing to do before start:
$ rosrun dynamic_reconfigure reconfigure_gui
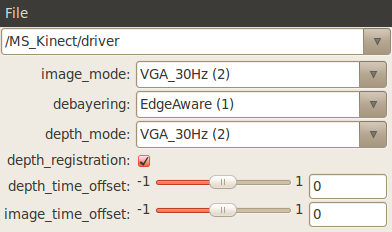
This will bring up the dynamic reconfigure gui, from the drop-down list, choose "MS_Kinect/driver", and then make sure the depth_registration checkbox is checked.
Note: all the terminal commands mentioned in this tutorial, if not otherwise noted, are entered from your local computer, and should be preceded by
$ export ROS_MASTER_URI=http://<your_pr2_name>:11311
Running urdf_updater.launch
Once you nailed Kinect camera, the rest will be easy.
On PR2, run urdf_updater.launch with arguments (urdf_updater.launch can be found in the 'launch' folder in camera_pose_toolkits package directory):
$ roslaunch camera_pose_toolkits urdf_updater.launch new_cam_ns:=MS_Kinect/rgb urdf_cam_ns:=/wide_stereo/left mounting_frame:=l_torso_lift_side_plate_link urdf_input_file:=/etc/ros/diamondback/urdf/robot.xml urdf_output_file:=/u/yiping/new.xml checker_rows:=4 checker_cols:=5 checker_size:=0.0249 headless:=1
And from the local machine,
$ rosrun image_view image_view image:=aggregated_image
Tip The app expects a "image_rect" topic under both camera namespaces, you may need to use a relay node to create such a topic, e.g. "rosrun topic_tools relay /camera/rgb/image_color /camera/rgb/image_rect"
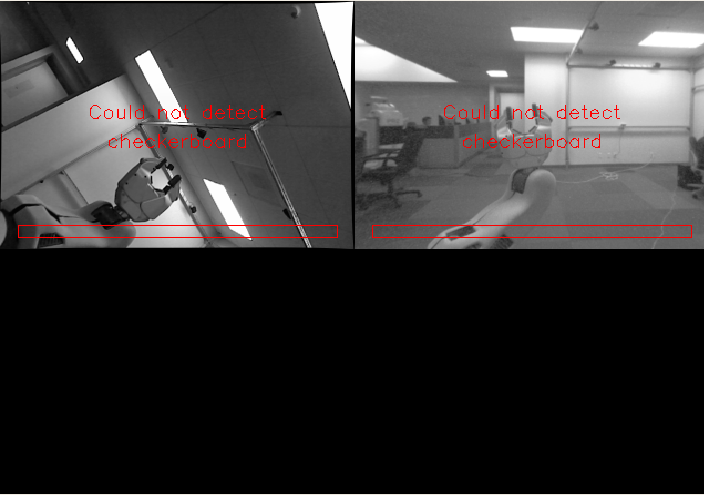
You will see the following aggregated image (the view on the left is from the side mounted Kinect camera, and the view on the right is from the left stereo camera):
Also from the local machine,
$ rosrun rviz rviz
Then display Robot Model and TF. You will see something similar to the following:
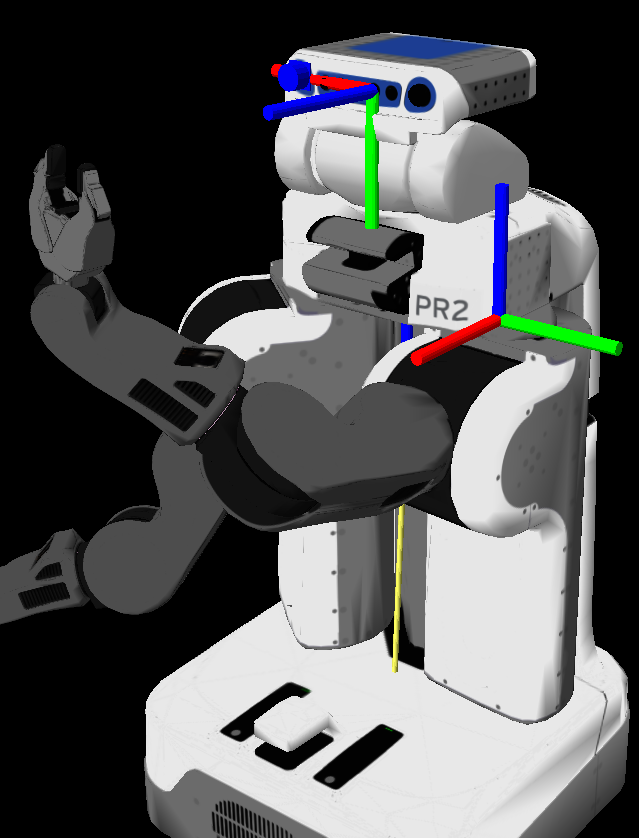
The frame on top is the wide stereo optical frame, the frame below is the left torso side plate frame. All other frames are disabled.
Now you can start capturing checkerboard poses. Details can be found in Section 5.3 in camera_pose_calibration. Once you see "Successfully captured checkerboard" and "Successfully ran optimization" in the aggregated image view, an updated robot description file is generated in the designated directory. Also, in Rviz, you will find that the Kinect camera frame appears.
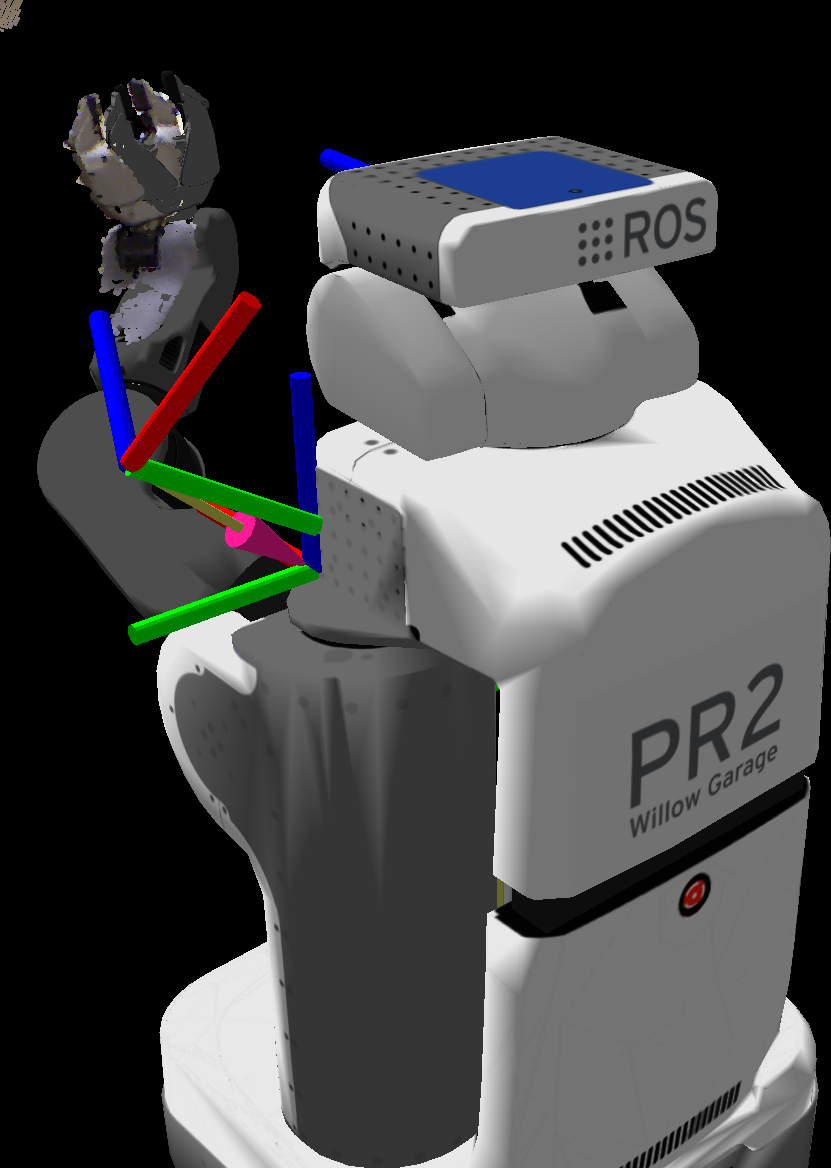
You can capture many checkerboard poses to allow the optimizer to produce more accurate results. The optimizer will perform optimization over the calibration results from all the checkerboard poses. The robot description file is automatically updated every time a better calibration result is generated.
If during the camera pose calibration, the head moves, i.e. the transformation between the left stereo camera frame and the left torso side plate frame changes (like shown in the figure below), the previous calibration result is saved as the 'best' result for the last pose of the left stereo camera relative to the left torso side plate frame, and the cache for the previous calibration results inside the optimizer is cleared before new calibration (taken under the new head pose) is taken in for optimization.
The final result will be the average between all the previous 'best' results (for different poses of the urdf camera relative to the mounting frame) and the current calibration result.
Results
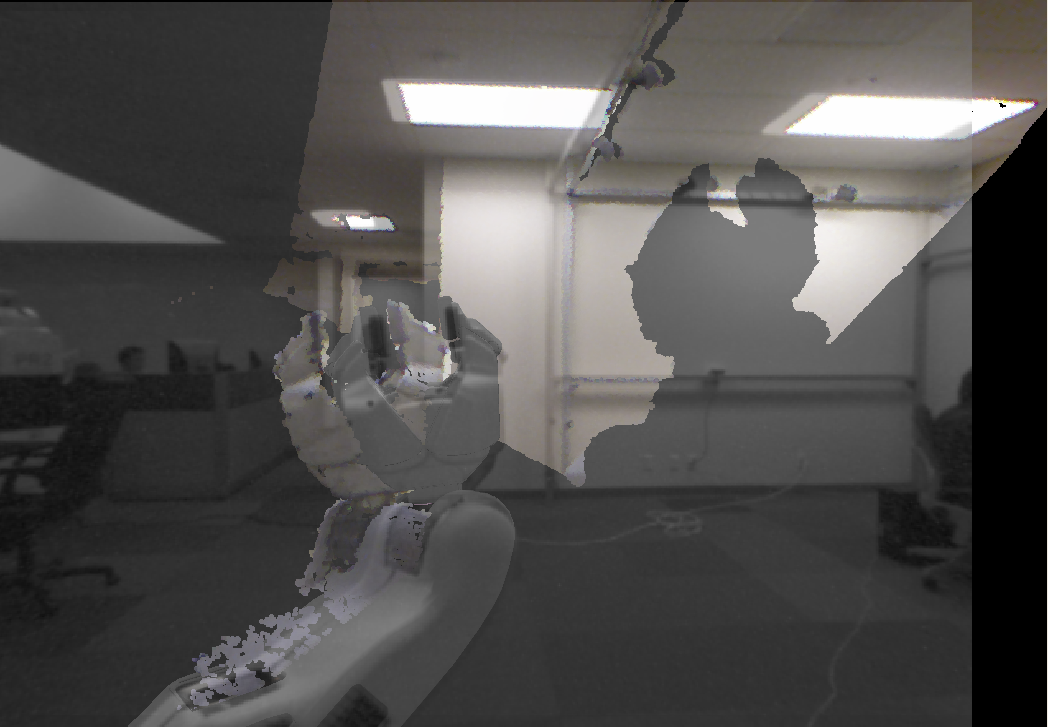
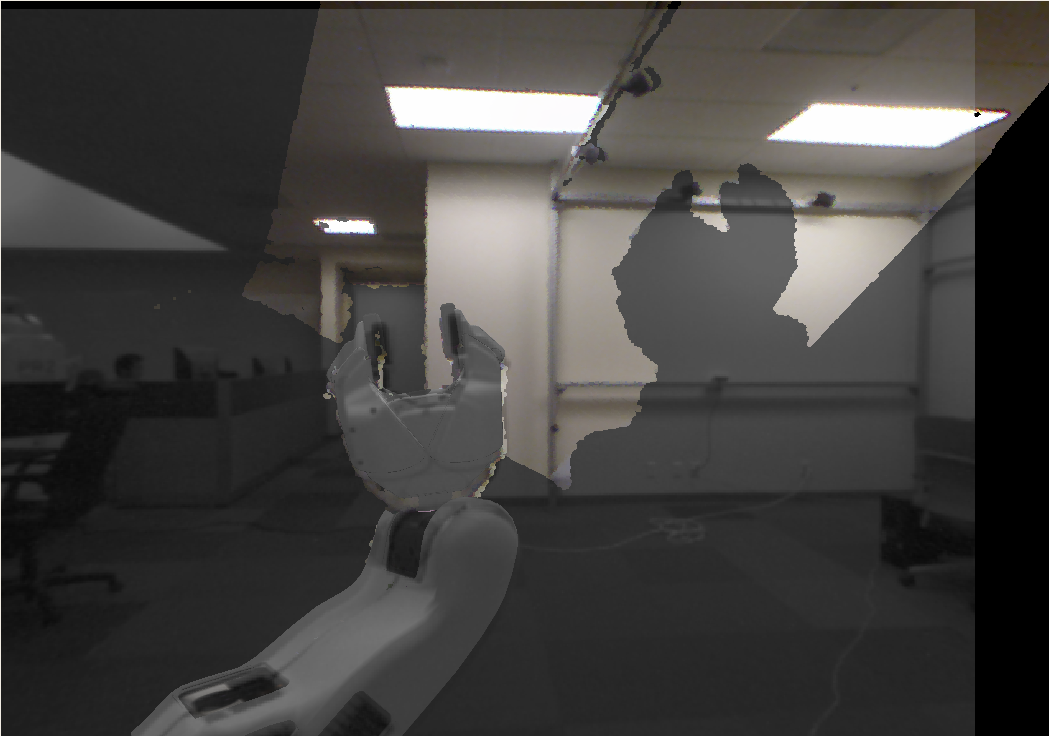
The following images are overlapped with the left wide stereo camera image, the point cloud generated by the Kinect depth camera and the PR2 robot model.
The first image is the result after the 1st calibration. We can see that the point clouds is not quite aligned with the wide stereo image.
The second image is the result after the 3rd calibration (same head pose). The calibration result improves significantly.
And in /u/yiping/new.xml, close to the end, you will find the added urdf snippet (reflecting the most recent calibration result)
  ...
  <!-- added after running camera_pose_calibration -->
  <joint name="MS_Kinect_rgb_optical_frame_joint" type="fixed">
     <origin rpy="-0.930031 -0.900216 -2.47067" xyz="-0.00406814 0.113357 0.146268"/>
     <parent link="l_torso_lift_side_plate_link"/>
     <child link="MS_Kinect_rgb_optical_frame"/>
  </joint>
  <link name="MS_Kinect_rgb_optical_frame" type="camera"/>
  ...


