| Note: This tutorial assumes that you have completed the previous tutorials: Visualisation. |
| |
Use Tango localization
Description: Tutorial showing how to use the different localization modes provided by TangoRosStreamer.Keywords: tango, ros, streamer, localization, map
Tutorial Level: BEGINNER
Next Tutorial: Use the tango ros node in your own app
General information
The Tango Ros Streamer application provides three localization modes that can be set via the UI or via the /tango/localization_mode ros parameter. Each localization mode corresponds to a different Tango configuration. To know more about Tango localization read the Tango documentation.
- ODOMETRY (value = 1)
With this mode, Tango uses pure VIO (Visual Inertial Odometry). No map is required.
- ONLINE_SLAM (value = 2)
With this mode, Tango uses COM (Concurrent Odometry and Mapping), sometimes also mentioned as drift correction in the Tango documentation. No map is required.
- LOCALIZATION (value = 3)
With this mode Tango uses a map, also mentioned as ADF (Area Description File) in the Tango documentation, and localize itself in this map. If you already made a map, you can set the map to use via the UI or via the /tango/localization_map_uuid ros parameter. If you do not have a map yet, you can create a new map by switching the option on via the UI or via the /tango/create_new_map ros parameter.
Note that each time you change the localization mode, the localization map UUID or switch on/off the create new map option, you will have to perform a disconnect/connect cycle from the Tango service for your changes to take effect. This can be done via the UI or via the ros service /tango/connect.
Record, save and load a map
In this section we will see how to create a map with Tango and use it for localization. Both the UI and the ROS workflows will be presented.
For the ROS workflow you will have to install the custom services on your desktop.
> mkdir -p ~/tango_ros_ws/src
> cd ~/tango_ros_ws/src
> git clone --recursive git@github.com:Intermodalics/tango_ros.git
> cd ~/tango_ros_ws
> catkin build --no-jobserver tango_ros_messages
> source devel/setup.bash
To check that the services are correctly installed you can run:
> rossrv list
The list should contain the following services:
tango_ros_messages/GetMapName
tango_ros_messages/GetMapUuids
tango_ros_messages/LoadOccupancyGrid
tango_ros_messages/SaveMap
tango_ros_messages/TangoConnect
At that point you should be able to call these services from your desktop.
Record a map
First of all, start a roscore on your desktop and the Tango Ros Streamer app on your device as described in the previous tutorial. Once the app started successfully, switch on the create new map option and restart the Tango Service.
UI way
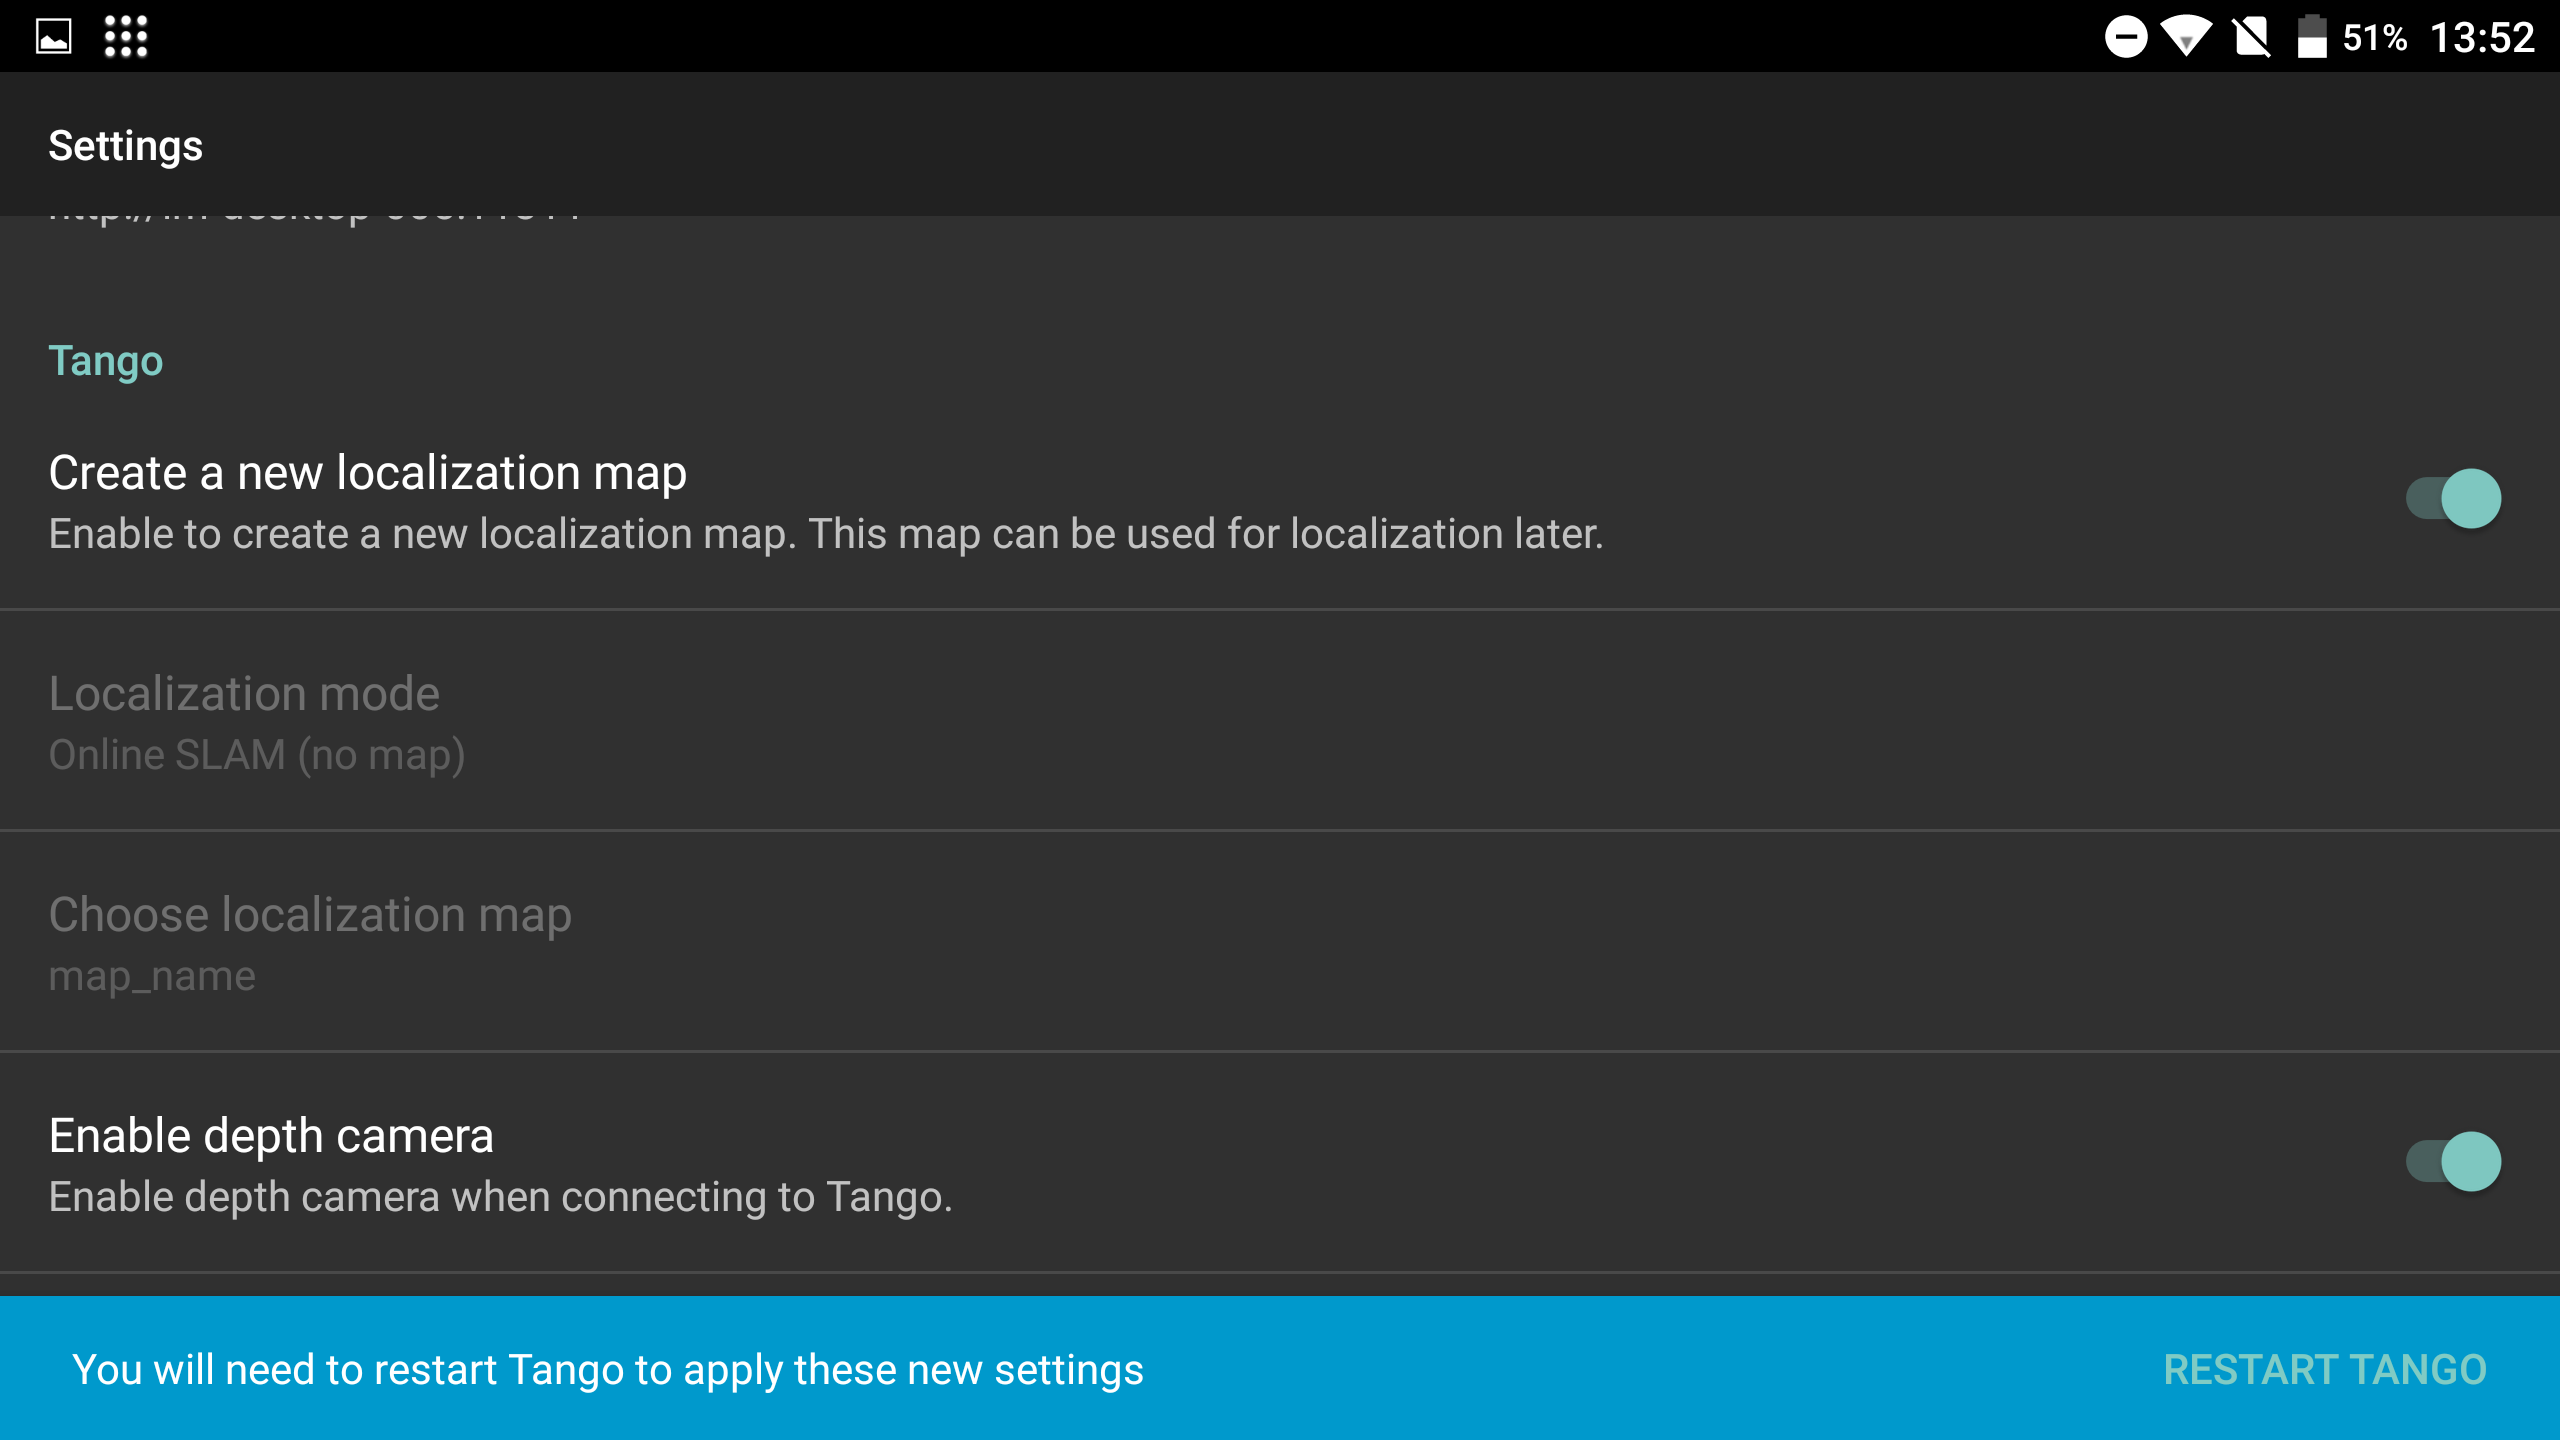
Go to the settings and set the Tango settings them as follow. 
Click on "RESTART TANGO" in the snackbar.
ROS way
> rosparam set /tango/create_new_map true
> rosservice call /tango/connect 2
Go around with your device to record a map of your environment. Some tips for a good mapping:
- Hold your device straight
- Perform some loop closures by going back to previously mapped areas
- Map corridors in both directions
Save a map
Once you have mapped your environment, save the map and give it a name. Note that to each map name corresponds a UUID (Universally Unique IDentifier).
UI way
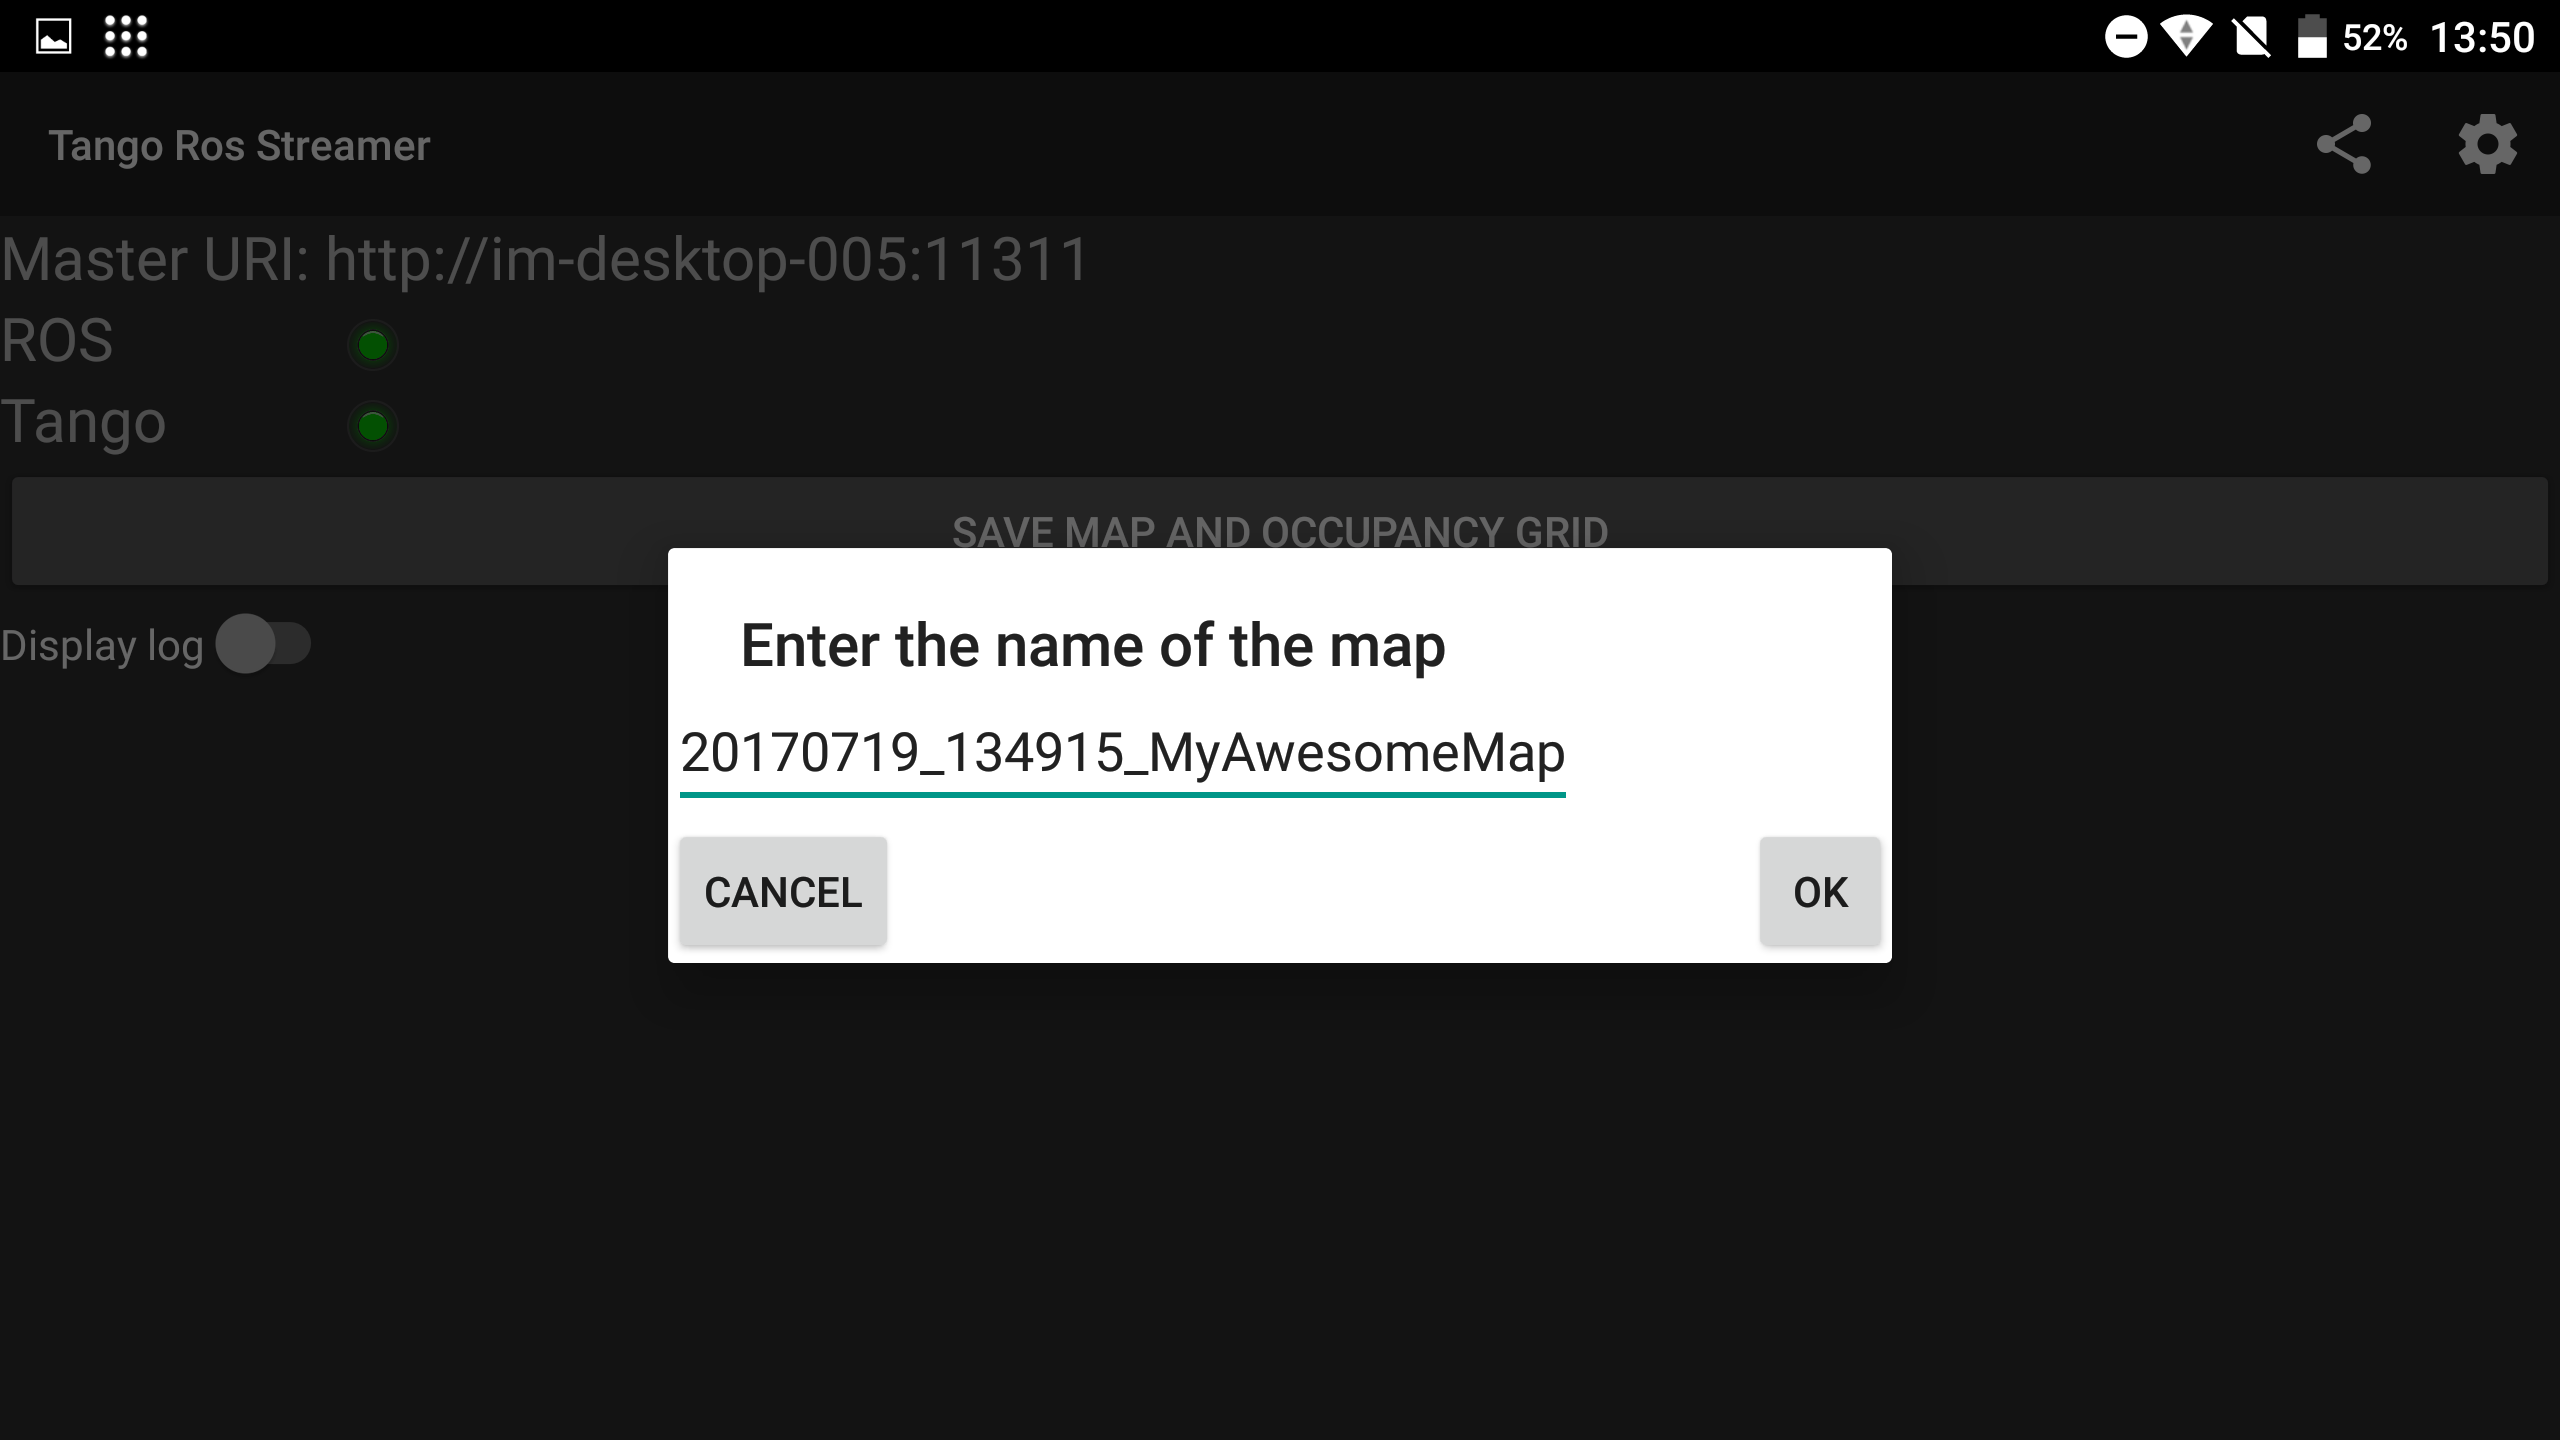
Press the "SAVE MAP" button, enter the name of the map in the popup and press "OK". Note that once your map is saved, the app will automatically disconnect from Tango. 
ROS way
> rosservice call /tango/save_map <name_of_your_map>
This call will display a success message where you can see the name and UUID of your new map.
Load a map
Once you have saved your map, you can switch to LOCALIZATION mode and use your map for localization.
UI way
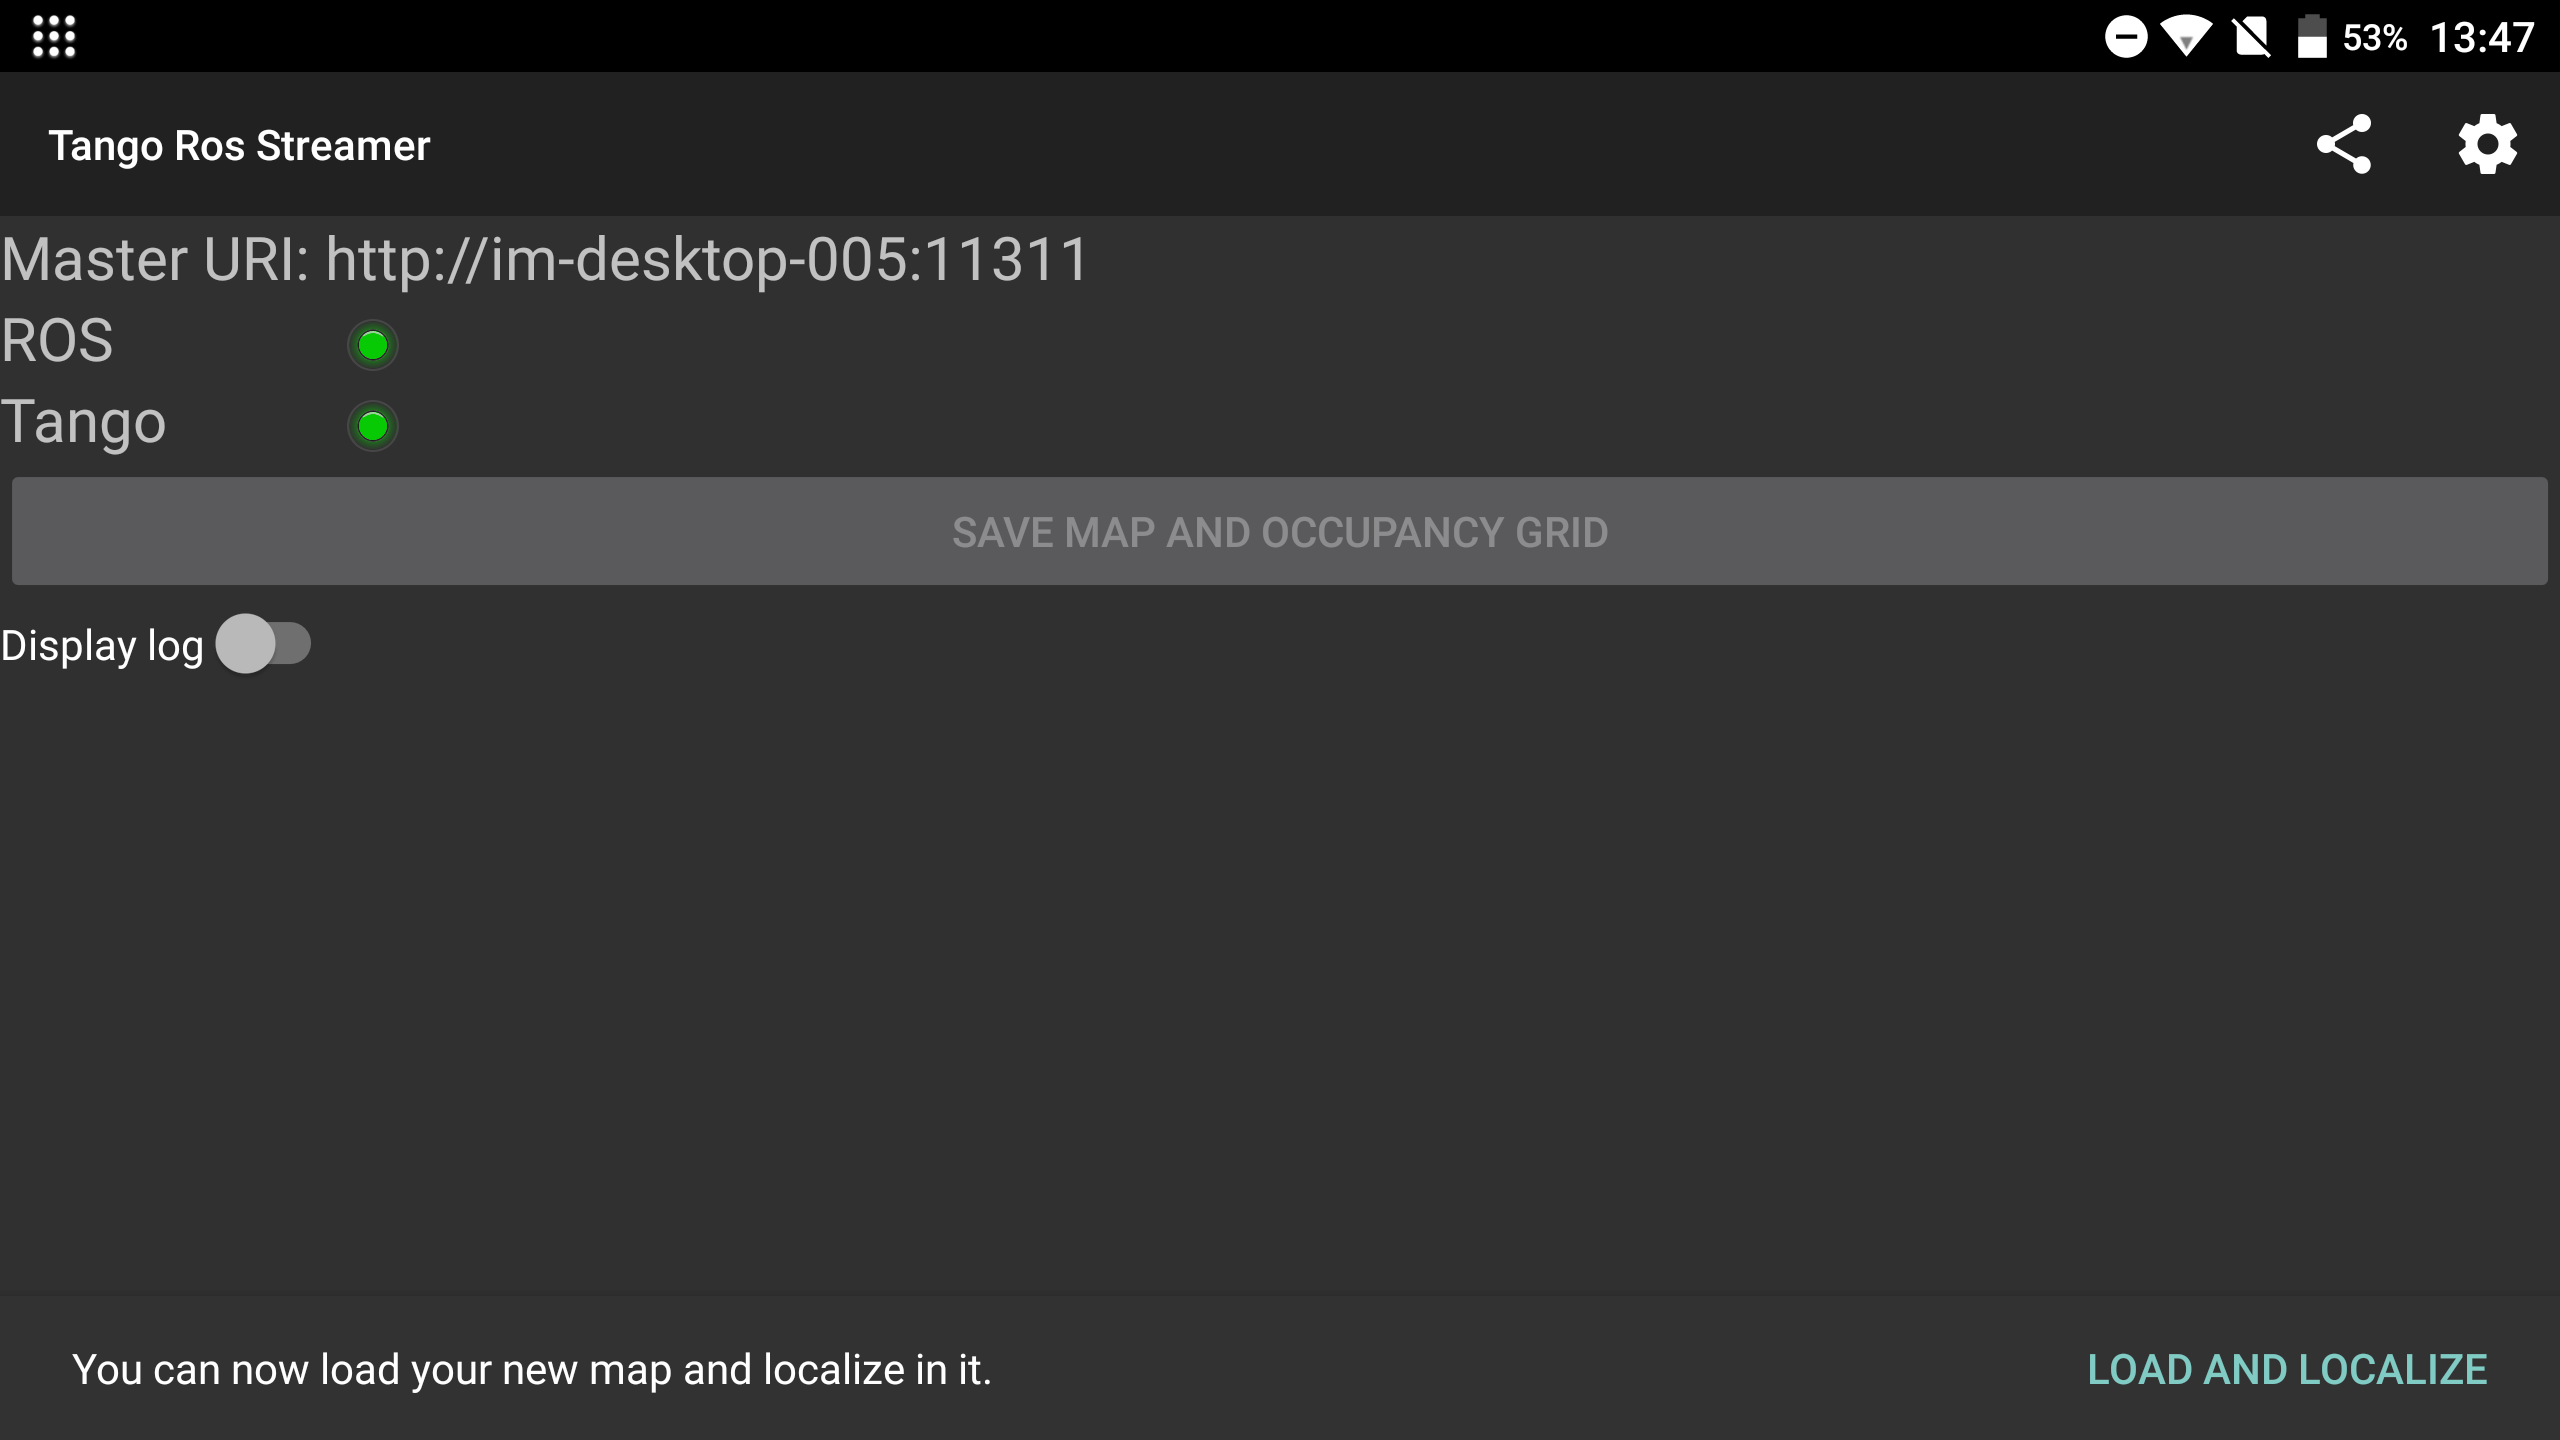
Click on "LOAD AND LOCALIZE" in the snackbar at the bottom. 
This will set the correct settings for you and connect to Tango.
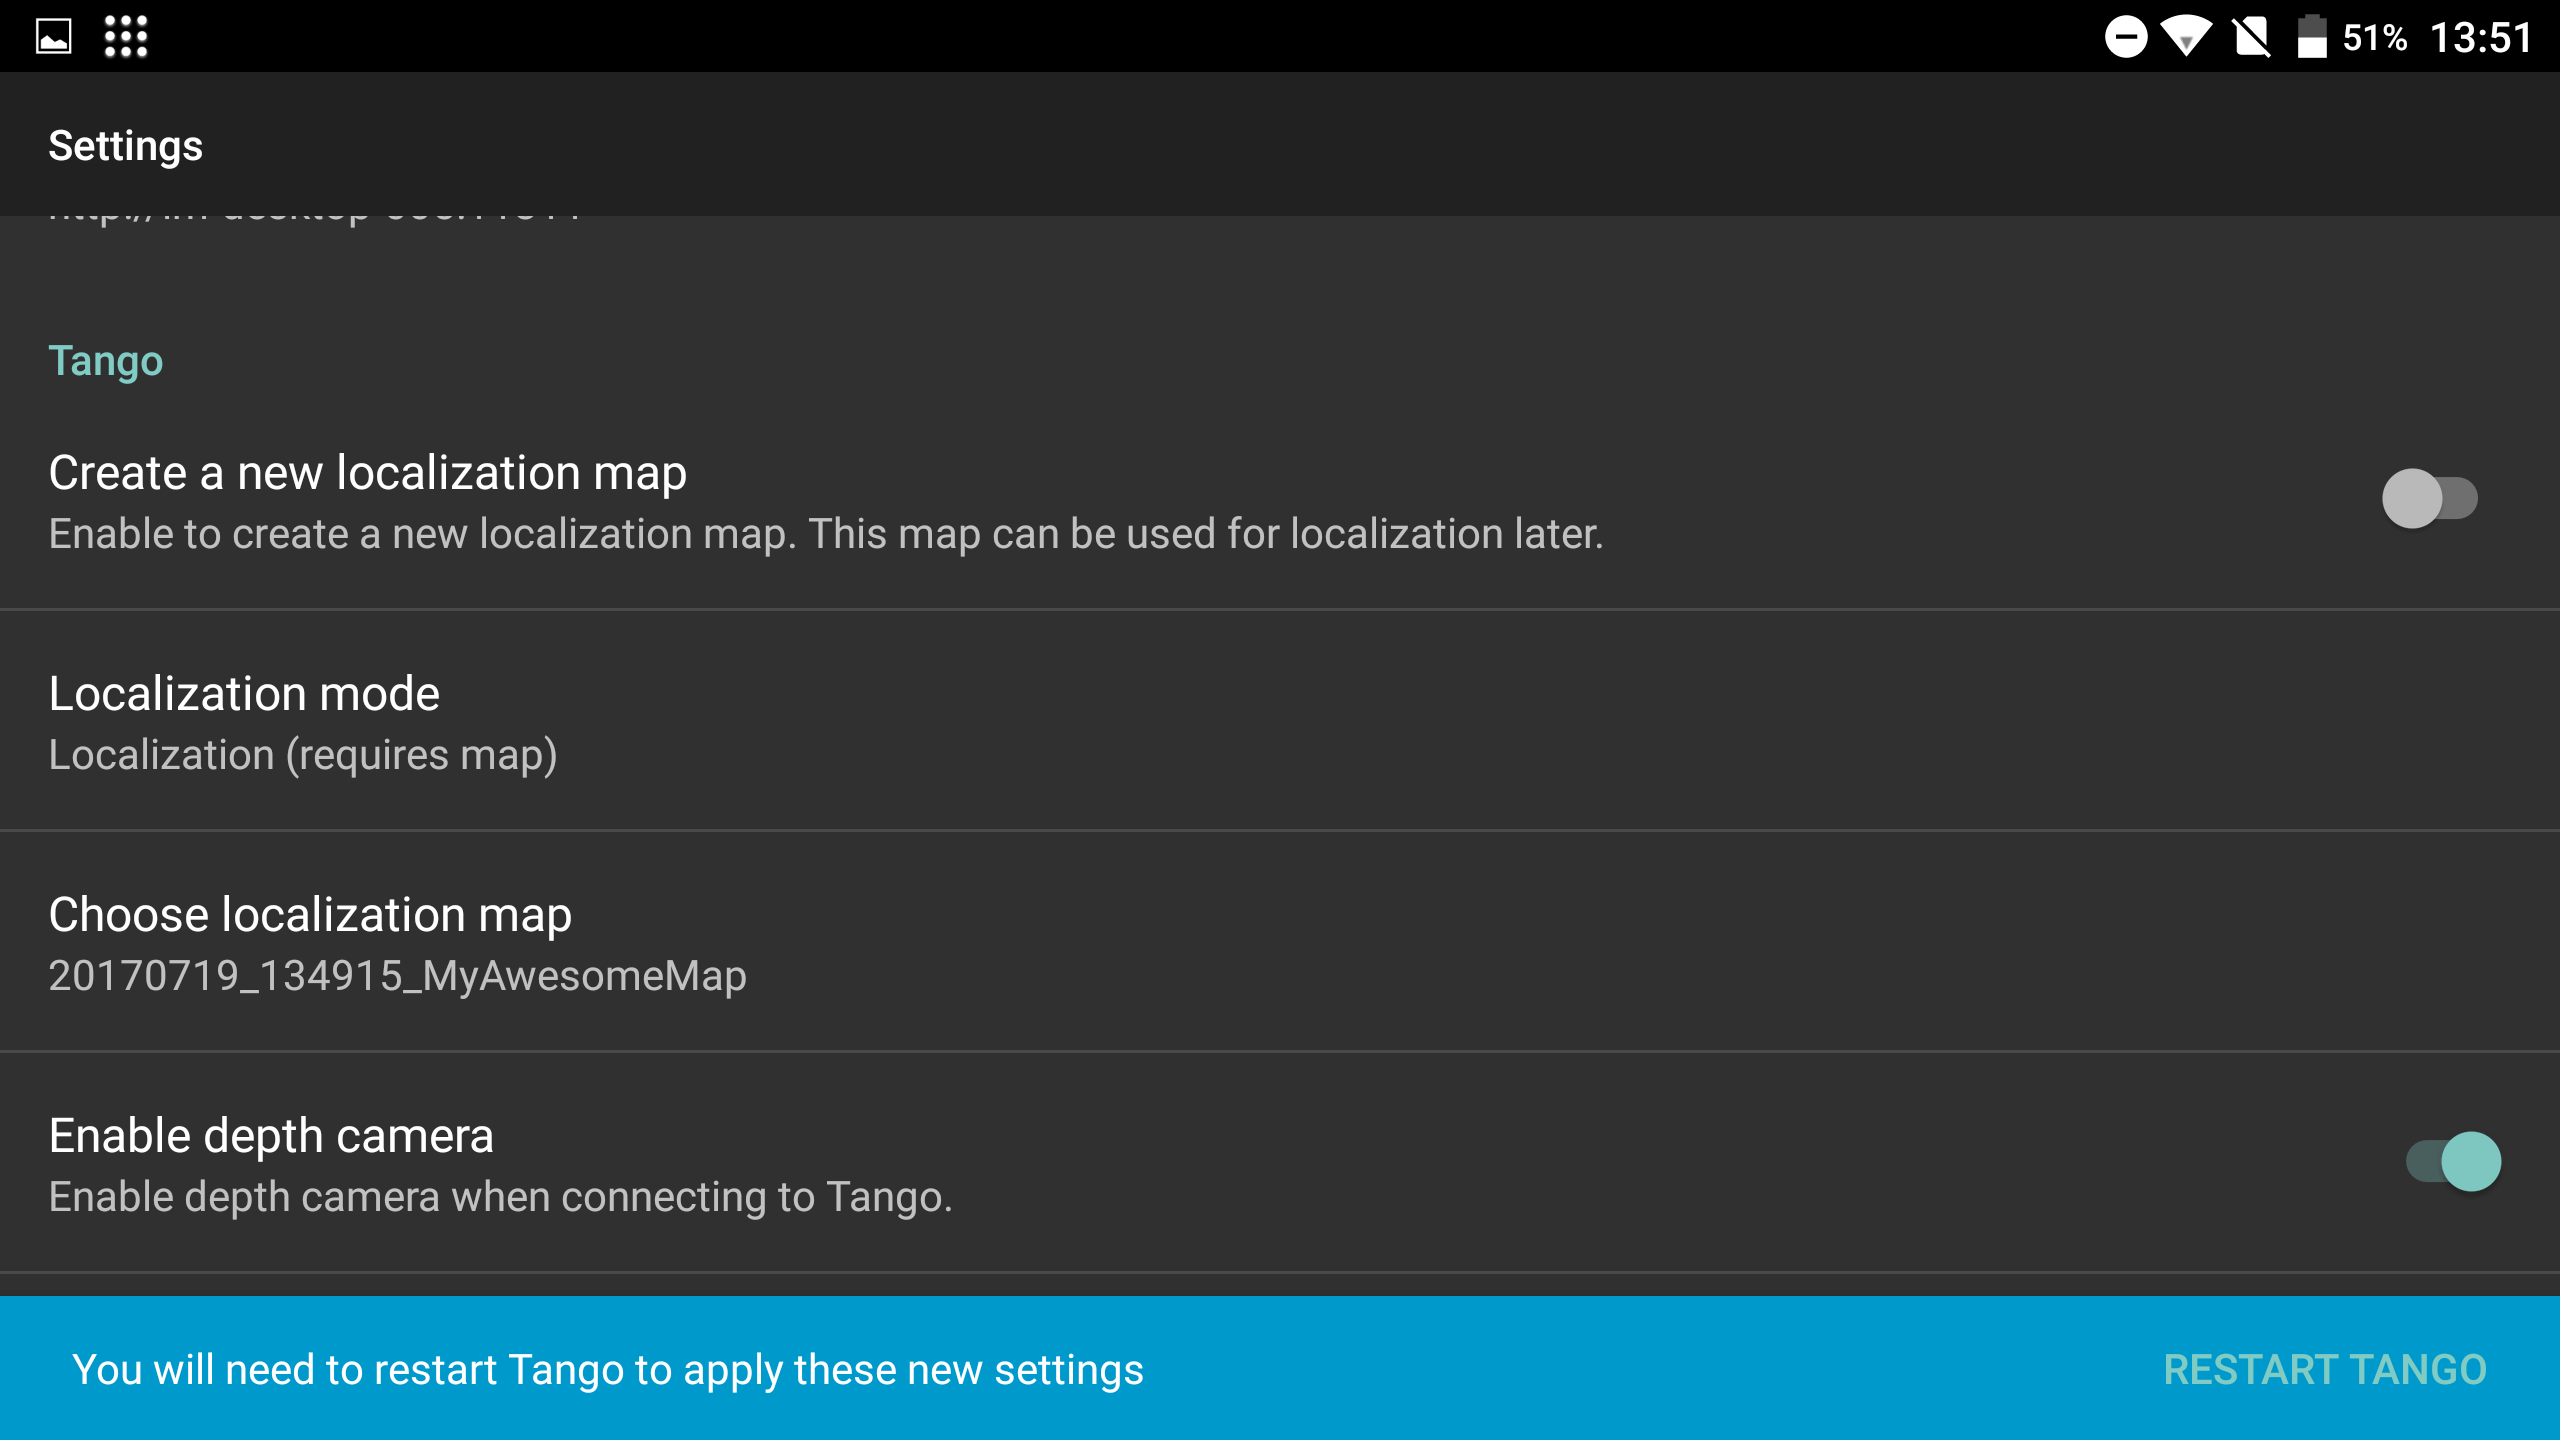
Or, go back to the settings and set the Tango settings manually as follow. 
Click on "RESTART TANGO" in the snackbar.
ROS way
> rosparam set /tango/create_new_map false
> rosparam set /tango/localization_mode 3
> rosparam set /tango/localization_map_uuid <uuid_of_your_map>
> rosservice call /tango/connect 2
If needed, you can retrieve the uuid of your map by running:
> rosservice call /tango/get_map_uuids
This will display a list of UUIDs and a list of names. Each map has its UUID and name located at the same position in each list.
If needed, you can also retrieve the name of a map given its UUID by running:
> rosservice call /tango/get_map_name <uuid_of_your_map>
And that's it! At that point Tango will localized itself using the recorded map.


