Author: Alessandro Di Fava < alessandro.difava@pal-robotics.com >
Maintainer: Jordi Pages < jordi.pages@pal-robotics.com >, Alessandro Di Fava < alessandro.difava@pal-robotics.com >
Support: < tiago-support@pal-robotics.com >
Source: https://github.com/pal-robotics/tiago_tutorials.git
| |
Planning with Octomap demo
Description: Use Octomap in MoveIt! to compute the collision checking with the environment around the robot during the motion planning of poses given in cartesian spaceKeywords: Octomap, MoveIt!, motion planning, cartesian space, inverse kinematics
Tutorial Level: INTERMEDIATE
Next Tutorial: Pick and place
Contents
Purpose
The purpose of this tutorials is to provide an example of using Octomap in MoveIt! to plan with TIAGo. The Occupancy map monitor of MoveIt! uses an Octomap to maintain the 3D representation of the environment around the robot. A simulation environment comprising a table with some objects is defined. The robot locates the environment in its camera and builds the Octomap. Then, MoveIt! is used to plan a joint trajectory in order to reach a given pose in cartesian space. MoveIt! uses the Octomap into the collision checking library.
Pre-Requisites
First, make sure that the tutorials are properly installed along with the TIAGo simulation, as shown in the Tutorials Installation Section.
Execution
Open three consoles and source the catkin workspace of the public simulation
cd /tiago_public_ws/
source ./devel/setup.bash
Launching the simulation
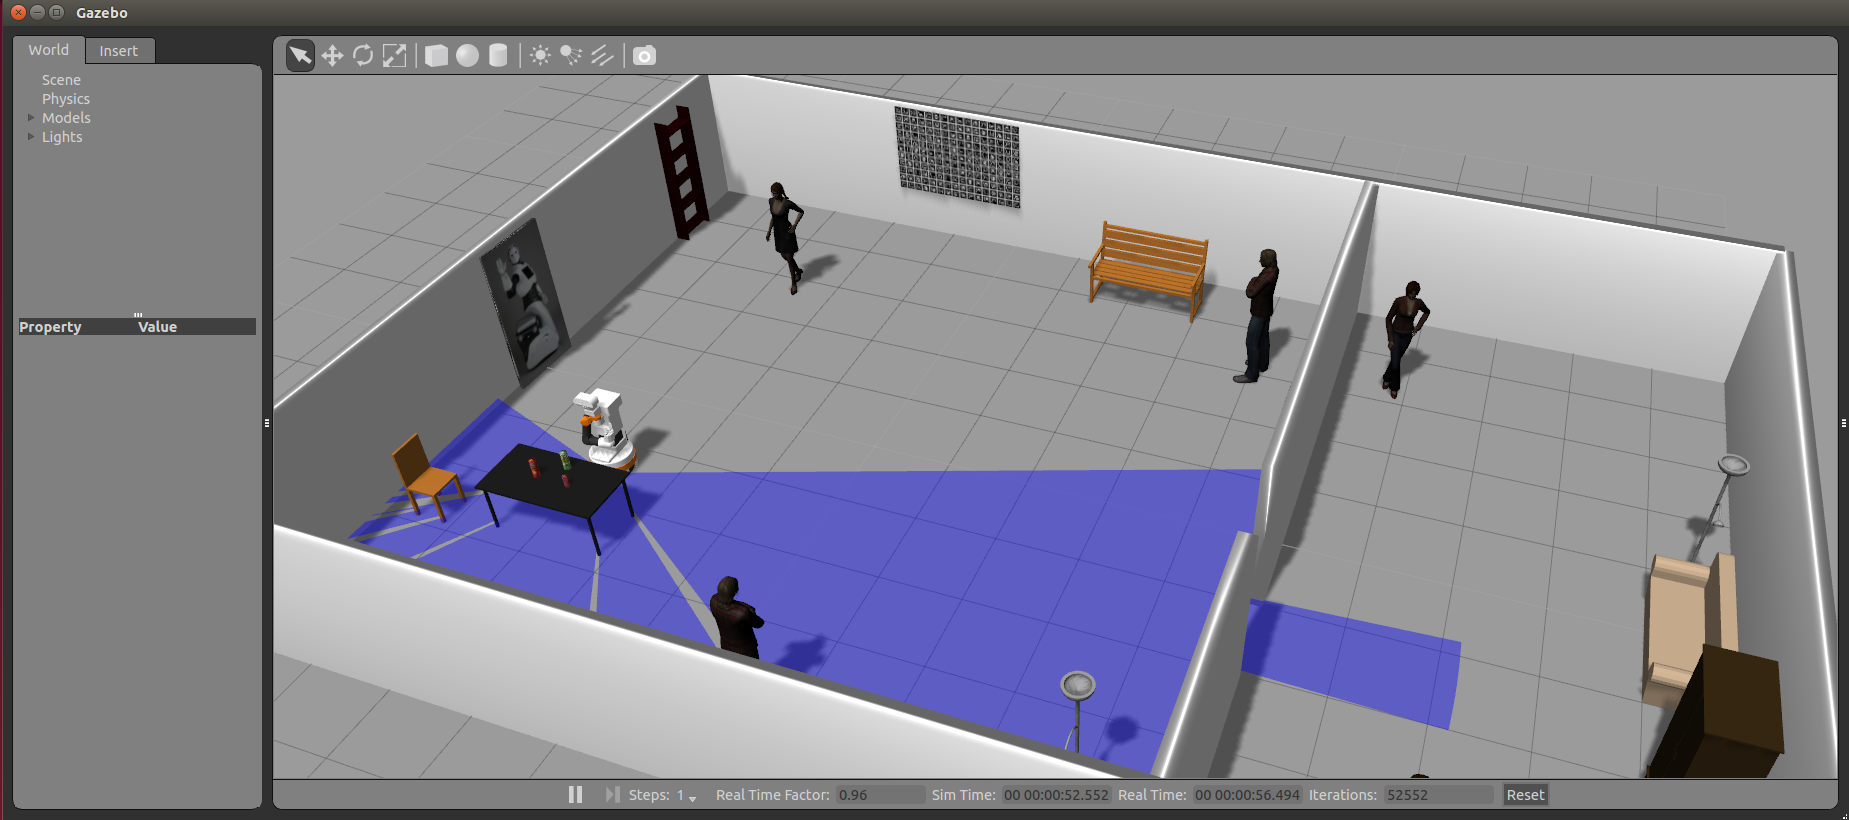
In the first console launch the following simulation which spawns TIAGo in front of a table with some objects on its top
roslaunch tiago_gazebo tiago_gazebo.launch public_sim:=true end_effector:=pal-gripper world:=tutorial_office gzpose:="-x 1.40 -y -2.79 -z -0.003 -R 0.0 -P 0.0 -Y 0.0" use_moveit_camera:=true
Gazebo will show up with TIAGo. When the simulation is launched, the MoveIt! is automatically launched. The camera:=true parameter will enable MoveIt! to use input from the depth sensor. The Octomap configuration, defined in tiago_moveit_config/launch/tiago_moveit_sensor_manager.launch.xml, specifies the coordinate frame in which this representation will be stored. The coordinate frame in this demo is odom (see http://docs.ros.org/indigo/api/moveit_tutorials/html/doc/pr2_tutorials/planning/src/doc/perception_configuration.html for details about Moveit! Octomap configuration).
Wait until TIAGo has tucked its arm. Then you may proceed with the next steps.
Launching the nodes
On the second console run the keypoint extractor node
roslaunch tiago_moveit_tutorial octomap_tiago.launch
which will launch Rviz in order to help the user visualize the different steps involved in the demo.
On a third console, launch a topic throttle to reduce the point cloud publish frequency to 2, and name it to the topic moveit is expecting.
rosrun topic_tools throttle messages /xtion/depth_registered/points 2 /throttle_filtering_points/filtered_points

Starting the demo
In the third console the head_look_around motion will be run in order to start the robot to locates the environment around it. When the simulation is launched, the play_motion action server is automatically launched (see http://wiki.ros.org/Robots/TIAGo/Tutorials/motions/play_motion for details). Before to run the head_look_around motion the tiago_moveit_tutorial/config/tiago_octomap_motions.yaml needs to be loaded in the ros parameter server.
rosparam load `rospack find tiago_moveit_tutorial`/config/tiago_octomap_motions.yaml
Then, in order to execute this motion the following node will be used
rosrun play_motion run_motion head_look_around
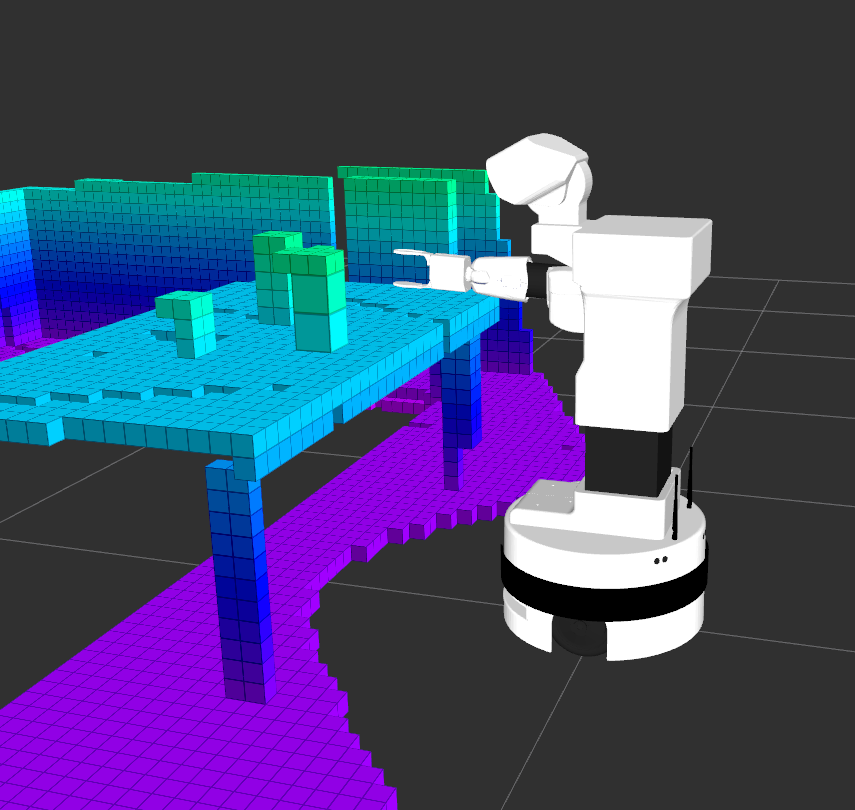
This motion will move the TIAGo head to locates the table and the objects on its top.
Instead of the head_look_around motion, you can also choose to move the TIAGo head by yourself using the following command (see http://wiki.ros.org/Robots/TIAGo/Tutorials/motions/head_action for details)
rosrun look_to_point look_to_point
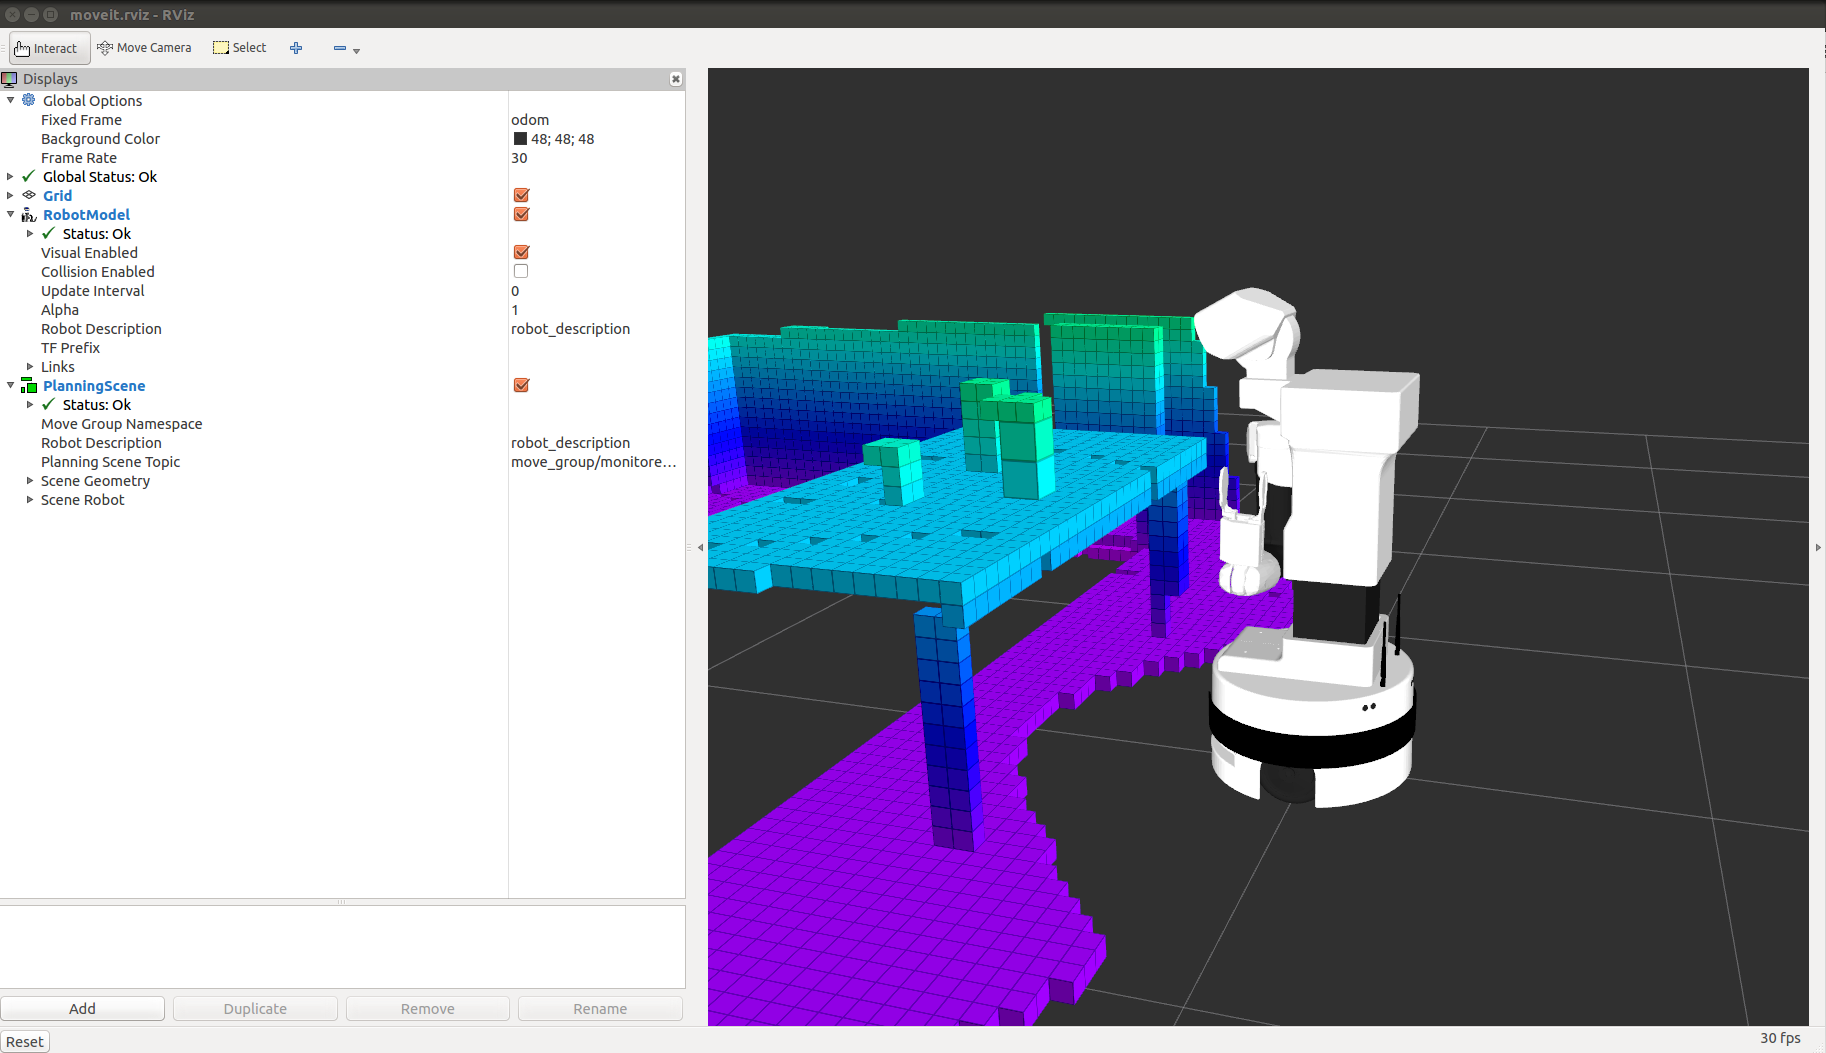
When the head_look_around motion node is finished, Rviz will show the built Octomap of the environment.
Then, in the same console (the third console), the following motion will be run (see http://wiki.ros.org/Robots/TIAGo/Tutorials/motions/play_motion for details), in order to move TIAGo to a suitable pose to start the motion planning.
rosrun play_motion run_motion unfold_arm
Wait until TIAGo has unfolded its arm. Then you may proceed with the next steps.
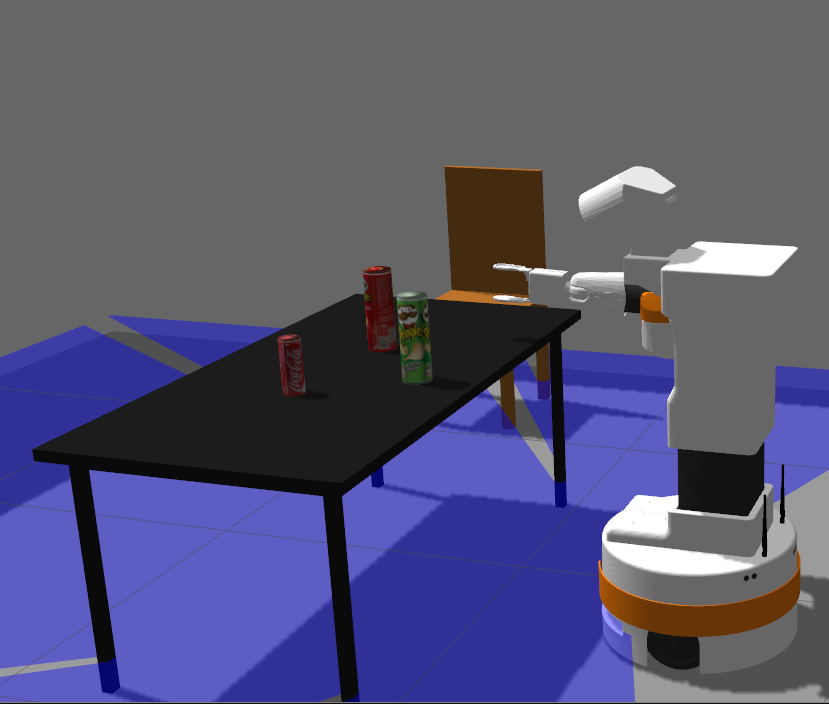
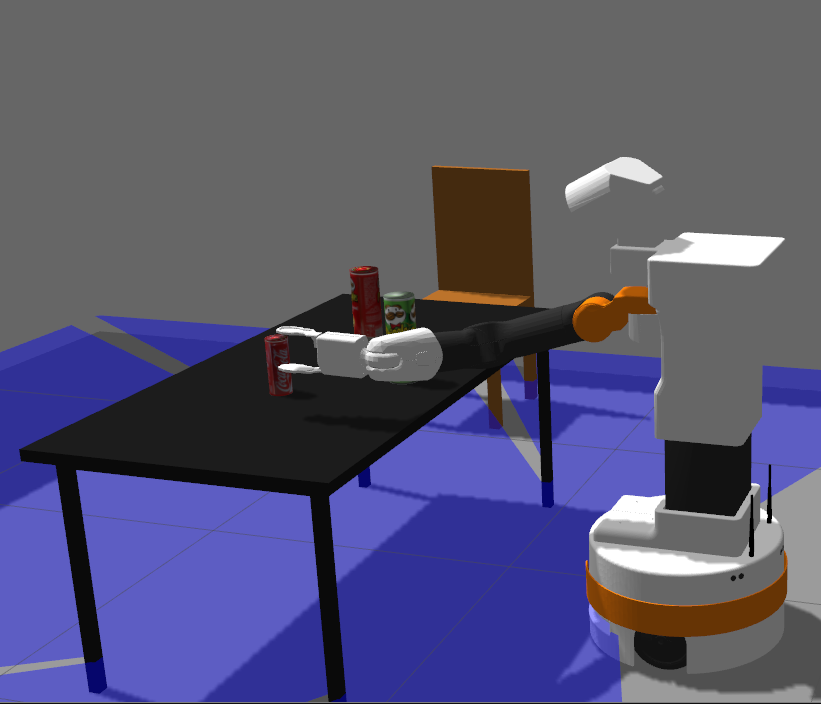
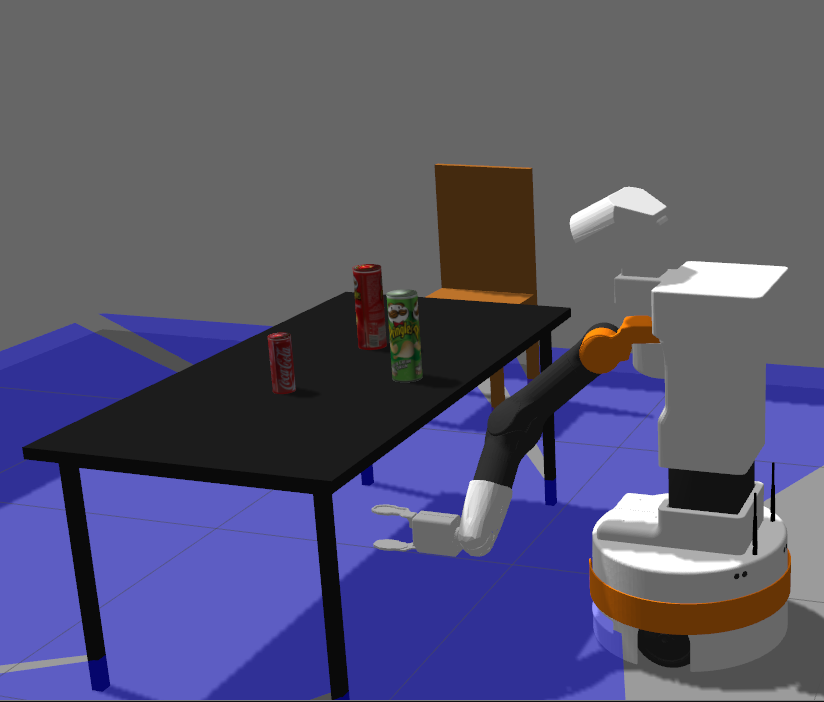
When the unfold_arm motion node is finished, we are going to run an example that will bring TIAGo's end-effector frame, i.e. arm_tool_link, to the three cartesian space configurations with respect to /base_footprint (see http://wiki.ros.org/Robots/TIAGo/Tutorials/MoveIt/Planning_cartesian_space for details).
The three cartesian space configurations with respect to /base_footprint are:
x: 0.508
y: -0.408
z: 0.832
Roll: 0.005
Pitch: -0.052
Yaw: 0.039
x: 0.706
y: 0.357
z: 0.839
Roll: 0.007
Pitch: -0.041
Yaw: 0.040
x: 0.5
y: 0.35
z: 0.38
Roll: 0.003
Pitch: -0.030
Yaw: 0.039
In order to safely reach such cartesian goals the node plan_arm_torso_ik, included in tiago_moveit_tutorial package, has to be called as follows. Please wait each node to be finished before running the next node.
rosrun tiago_moveit_tutorial plan_arm_torso_ik 0.508 -0.408 0.832 0.005, -0.052, 0.039
rosrun tiago_moveit_tutorial plan_arm_torso_ik 0.706 0.357 0.839 0.007, -0.041, 0.040
rosrun tiago_moveit_tutorial plan_arm_torso_ik 0.5 0.35 0.38 0.003, -0.030, 0.039
Sometimes MoveIt! raises internal errors, it can come with plan not found or impossibility to execute the planned trajectory, in this case please run again the single command that has generated the error.
The following images depict the final pose of /arm_tool_link after the execution of each node:
|
|
|
An example of execution of the three nodes is shown in the following video:
MoveIt! RViz Plugin
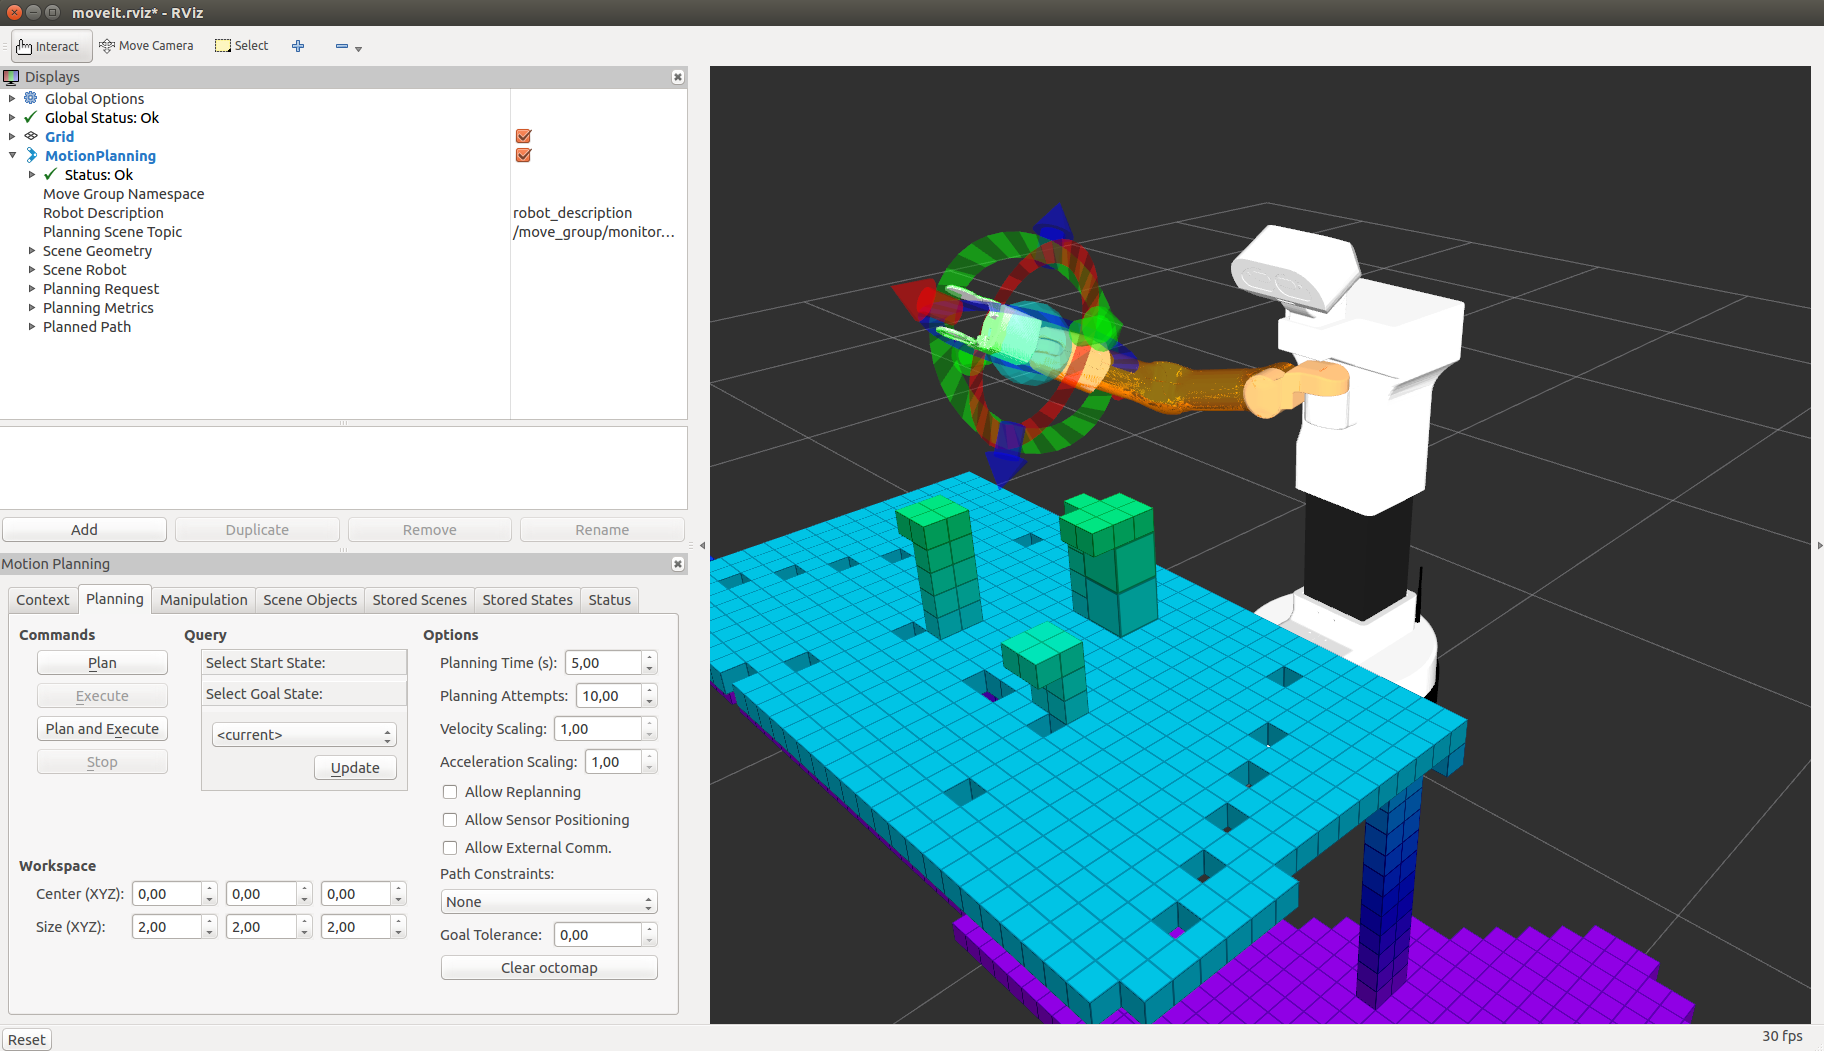
MoveIt! comes with a plugin for the ROS Visualizer (RViz) (see http://docs.ros.org/indigo/api/moveit_tutorials/html/doc/ros_visualization/visualization_tutorial.html for details). This is a graphical way to define new goal. The plugin allows you to setup scenes in which the robot will work, generate plans, visualize the output and interact directly with a visualized robot.
The usage of the MoveIt! RViz plugin with Octomap in our simulation is as follows
roslaunch tiago_moveit_config demo_tiago.launch
Rviz will show up with TIAGo and the interactive marker. The image shows the MoveIt! RViz plugin with Octomap after the head_look_around and unfold_arm motions. 