| Note: This tutorial assumes that you have completed the previous tutorials: RGB-D Hand-Held Mapping With a Kinect. |
| |
Remote Mapping
Description: This tutorial shows how to do mapping on a remote computer.Tutorial Level: BEGINNER
Next Tutorial: Setup RTAB-Map on your robot!
Contents
Robot
For simplification, I will just show nodes/launch files used for mapping. Your robot may have other stuff launched at the same time. Here I assume that the ROS Master is on the robot, and a Kinect is used.
1. [Optional]: To avoid host name resolution issues, set ROS_IP environment variable for the robot:
$ ifconfig
eth0      Link encap:Ethernet  HWaddr ##:##:##:##:##:##
          inet addr:192.168.1.3  Bcast:192.168.1.255  Mask:255.255.255.0
...
$ export ROS_IP=192.168.1.3
2. We will throttle the Kinect messages on the robot at 5 Hz to reduce the bandwidth used on the network (reducing latency). We can use rtabmap_ros/data_throttle nodelet for convenience. Create a file called freenect_throttle.launch and copy/paste this code:
<launch>
  <include file="$(find freenect_launch)/launch/freenect.launch">
     <arg name="depth_registration" value="True" />
  </include>

  <arg name="rate"  default="5"/>
  <arg name="decimation"  default="1"/> <!-- Reduce the image size, e.g., 2 means "width/2 x height/2".

  <!-- Use same nodelet used by Freenect/OpenNI -->
  <group ns="camera">
    <node pkg="nodelet" type="nodelet" name="data_throttle" args="load rtabmap_ros/data_throttle camera_nodelet_manager" output="screen">
      <param name="rate" type="double" value="$(arg rate)"/>
      <param name="decimation" type="int" value="$(arg decimation)"/>

      <remap from="rgb/image_in"       to="rgb/image_rect_color"/>
      <remap from="depth/image_in"     to="depth_registered/image_raw"/>
      <remap from="rgb/camera_info_in" to="rgb/camera_info"/>

      <remap from="rgb/image_out"       to="data_throttled_image"/>
      <remap from="depth/image_out"     to="data_throttled_image_depth"/>
      <remap from="rgb/camera_info_out" to="data_throttled_camera_info"/>
    </node>
  </group>
</launch>
3. Launch the file:
$ roslaunch freenect_throttle.launch rate:=5
Remote Client Computer
On the client computer, we will launch rtabmap, rgbd_odometry and rtabmapviz using rtabmap.launch for convenience.
1. [Optional]: To avoid host name resolution issues, set ROS_IP environment variable for the client:
$ ifconfig
eth0      Link encap:Ethernet  HWaddr ##:##:##:##:##:##
          inet addr:192.168.1.2  Bcast:192.168.1.255  Mask:255.255.255.0
...
$ export ROS_IP=192.168.1.2
2. Set ROS_MASTER_URI with the robot IP/hostname:
$ export ROS_MASTER_URI=http://192.168.1.3:11311
3. Launch rtabmap.launch (Warning with rtabmap_ros 0.10 binaries: Please use the updated launch file on master branch linked here instead of the one installed with the rtabmap_ros 0.10 binaries):
$ roslaunch rtabmap_ros rtabmap.launch rgb_topic:=/camera/data_throttled_image depth_topic:=/camera/data_throttled_image_depth camera_info_topic:=/camera/data_throttled_camera_info compressed:=true rtabmap_args:="--delete_db_on_start"
4. You should now see mapping in rtabmapviz window.
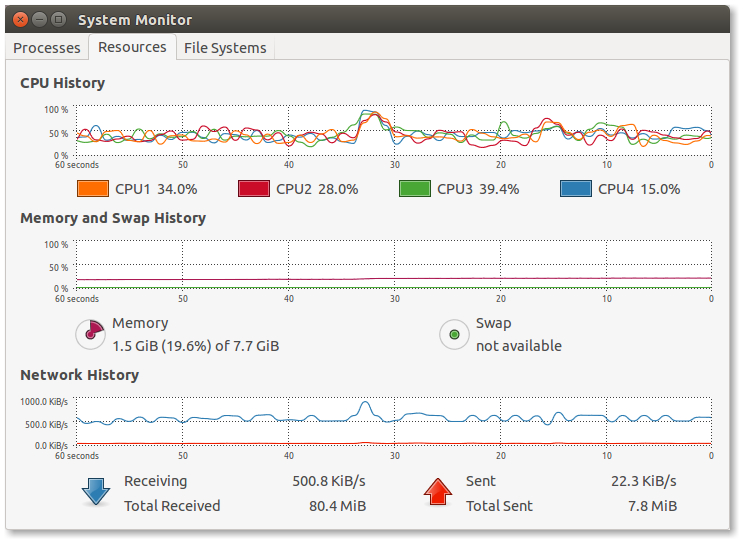
5. If you open the System Monitor of Ubuntu, you should have something like ~500 KiB/s of bandwidth used:

Advanced
1. If you have already odometry on the robot, you can set arguments visual_odometry:=false and odom_topic:="/odom.
2. For depth image when argument compressed:=true, the image_transport used is compressedDepth. For rgb image, the image_transport used is compressed by default, but you can change its type to theora for example (if available) using rgb_image_transport:=thereo.
3. You can use launch rviz manually or with argument rviz:=true for convenience. If you don't want rtabmapviz, you can disable it using rtabmapviz:=false argument.


