| Note: This tutorial assumes that you have completed the previous tutorials: ROS tutorials. |
| |
How to use Hokuyo Laser Scanners with the hokuyo_node
Description: This tutorial is an introduction to using a Hokuyo laser scanner connected to a desktop. After reading this tutorial, you should be able to bring up the hokuyo_node and display the laser data.Keywords: Hokuyo, laser, driver, UTM-30LX, URG-04LX, UBG-04LX-F01, URG-04LX-UG01
Tutorial Level: BEGINNER
Next Tutorial: How to dynamically reconfigure the hokuyo_node
Contents
Looking for a newer driver? urg_node is fully REP-138 compliant AND compatible with Ethernet/MultiEcho Hokuyos! Hokuyo_node will remain maintained for current users and PR2s.
Check it out at: http://ros.org/wiki/urg_node
Install
First you have to get the hokuyo_node package. You can install it using
$ sudo apt-get install ros-%DISTro%-hokuyo-node
Powered On and Plugged In
Make sure that your USB Hokuyo is plugged in and the power light is on.
Configuring the Hokuyo
Make sure that the hokuyo_node will be able to access the Hokuyo laser scanner.
Start by listing the permissions of the Hokuyo:
$ ls -l /dev/ttyACM0
You will see something similar to:
crw-rw-XX- 1 root dialout 166, 0 2009-10-27 14:18 /dev/ttyACM0
If XX is rw: the laser is configured properly.
If XX is --: the laser is not configured properly and you need to:
$ sudo chmod a+rw /dev/ttyACM0
Starting a roscore
For the hokuyo_node to work properly, a ros core must be running. In a new terminal:
$ roscore
Setting Parameters
Before we can run the hokuyo_node we need to make sure that we have the correct configurations loaded on the parameter server.
This option will speed up the startup of the driver, but will lead to less acurate timestamps:
$ rosparam set hokuyo_node/calibrate_time false
If your Hokuyo is not at the default /dev/ttyACM0 you have to indicate where it is below:
$ rosparam set hokuyo_node/port /dev/ttyACM0
Running the hokuyo_node
In a new terminal, run the hokuyo_node:
$ rosrun hokuyo_node hokuyo_node
You will see something similar to:
[ INFO] 1256687975.743438000: Connected to device with ID: H0807344
Viewing the data
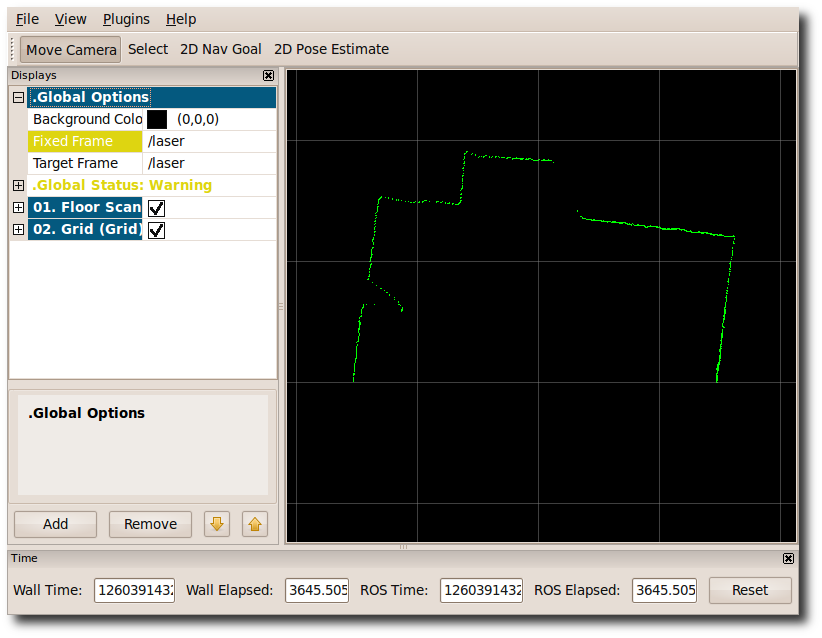
To see that everything is working and data is being published to ros, in a new terminal:
$ rosrun rviz rviz -d `rospack find hokuyo_node`/hokuyo_test.vcg
You will see the laser scan in rviz:


