| Note: This tutorial assumes that you have completed the previous tutorials: Calibrating the Kinect depth camera to an external RGB camera. |
| |
Calibrating the Kinect depth camera to the built-in RGB camera
Description: This tutorial demonstrates an alternative to OpenNI for registering the depth and RGB cameras based on a user calibration instead of the factory one. It requires an extrinsic calibration, calculating the relative transform between the two cameras.Tutorial Level: INTERMEDIATE
Should I calibrate?
As we saw in the Quick Start guide, OpenNI provides a good registration of the depth and RGB images out-of-the-box, using the factory calibration. This easy solution should be sufficient for most use cases.
Just as we can calibrate the depth camera to an external RGB camera, we can calibrate it to the built-in one. This has certain advantages:
- Registering the depth image compresses it into the narrower field of view of the RGB image, losing some information. For pure 3D processing (color not required), it is better to use the original depth image. Calibrating gives you the flexibility to use both registered and unregistered depth streams simultaneously.
As a corollary: if you have (intentionally or by mistake) recorded a bag containing RGB and unregistered depth data, you can recover registered depth data.
- Registration based on a user calibration may achieve slightly better accuracy, but this is limited by noise in the detected depths.
Disadvantages include:
- The extra effort required.
- Some sensors (e.g. the ASUS Xtion PRO Live, but not the Kinect) have hardware support for registration, saving CPU cycles.
Intrinsic calibration
Make sure you have calibrated the depth and RGB camera intrinsics.
Extrinsic calibration
First read through the tutorial for calibrating to an external RGB camera. The approach here is the same, but there is a significant complication: the Kinect cannot stream from its RGB and IR cameras simultaneously. This is likely a firmware limitation.
Unfortunately, this breaks camera_pose_calibration, which achieves its robustness by looking for time intervals where the checkerboard is stable and visible in all cameras. We will coerce it into working, through a series of hacks to create the illusion of simultaneous RGB and IR streams.
Create and bring up a launch file that opens the Kinect and starts the extrinsic tf publisher:
<launch>

  <!-- Bring up Kinect and processing nodelets -->
  <include file="$(find openni_launch)/launch/openni.launch">
    <!-- Set cam info URLs, if not in the default location -->

    <!-- Suppress the default tf transforms (Fuerte only) -->
    <arg name="publish_tf" value="false" />
  </include>

  <!-- Extrinsic transform publisher -->
  <include file="$(find camera_pose_calibration)/blocks/calibration_tf_publisher.launch">
    <arg name="cache_file" value="/some/path/kinect_extrinsics_cache.bag" />
  </include>

</launch>
Make sure to set cache_file to a real path.
openni.launch publishes a default set of tf transforms linking the IR and RGB cameras. We must suppress these defaults, as camera_pose_calibration will provide that transform instead. In Fuerte we can use the publish_tf argument. In Electric, copy openni.launch and remove the lines at the bottom that include kinect_frames.launch.
Rigidly place your checkerboard target in view of the Kinect. Since we are hacking away the robustness guarantees of camera_pose_calibration, it is crucial that neither the Kinect nor the checkerboard move through the rest of the process. Provide diffuse IR illumination (place a Post-it over the projector) and verify that the checkerboard is clearly visible to both cameras:
rosrun image_view image_view image:=/camera/ir/image_raw

rosrun image_view image_view image:=/camera/rgb/image_color
Use rosbag to record 10 seconds of RGB data to rgb.bag:
rosbag record --limit=300 -O rgb.bag /camera/rgb/image_rect /camera/rgb/camera_info
Later we will play this back while streaming live from the IR camera. But first, we must enter the realm of simulated time:
rosparam set /use_sim_time true
Bring down (Ctrl-C) your launch file and bring it back up again. The /use_sim_time tells all nodes to listen on the /clock topic for the current ROS time, instead of using the system wall-clock time. The OpenNI driver will not fully initialize at this point, because it is waiting for a clock server. Play your recorded bag once to nudge it along:
rosbag play rgb.bag --clock
The --clock option tells rosbag to act as the clock server, and publish simulated time ticks on /clock in synch with the recorded messages it's playing back.
Start the calibrator, substituting your checkerboard dimensions:
roslaunch camera_pose_calibration calibrate_2_camera.launch camera1_ns:=/camera/rgb_bag camera2_ns:=/camera/ir checker_rows:=4 checker_cols:=5 checker_size:=0.0249
Now play the bag again:
rosbag play rgb.bag --clock /camera/rgb/camera_info:=/camera/rgb_bag/camera_info /camera/rgb/image_rect:=/camera/rgb_bag/image_rect
This time we remap the RGB topics so as not to conflict with the real, live RGB topics. The calibrator listens on the live IR topics and the recorded RGB topics.
The calibrator should find the checkerboard and successfully run the optimization. For simplicity we'll only use one checkerboard view; this is not ideal but should be adequate. The tf publisher caches the transform to whatever path you gave it with the cache_file argument.
Now bring everything down and disable simulated time:
rosparam set /use_sim_time false
Color point clouds
Bring your Kinect launch file up once more. openni.launch already loads all the depth_image_proc nodelets required to register the depth camera to the built-in RGB camera. Make sure you have unblocked the IR projector - the Kinect won't see depth at all without it!
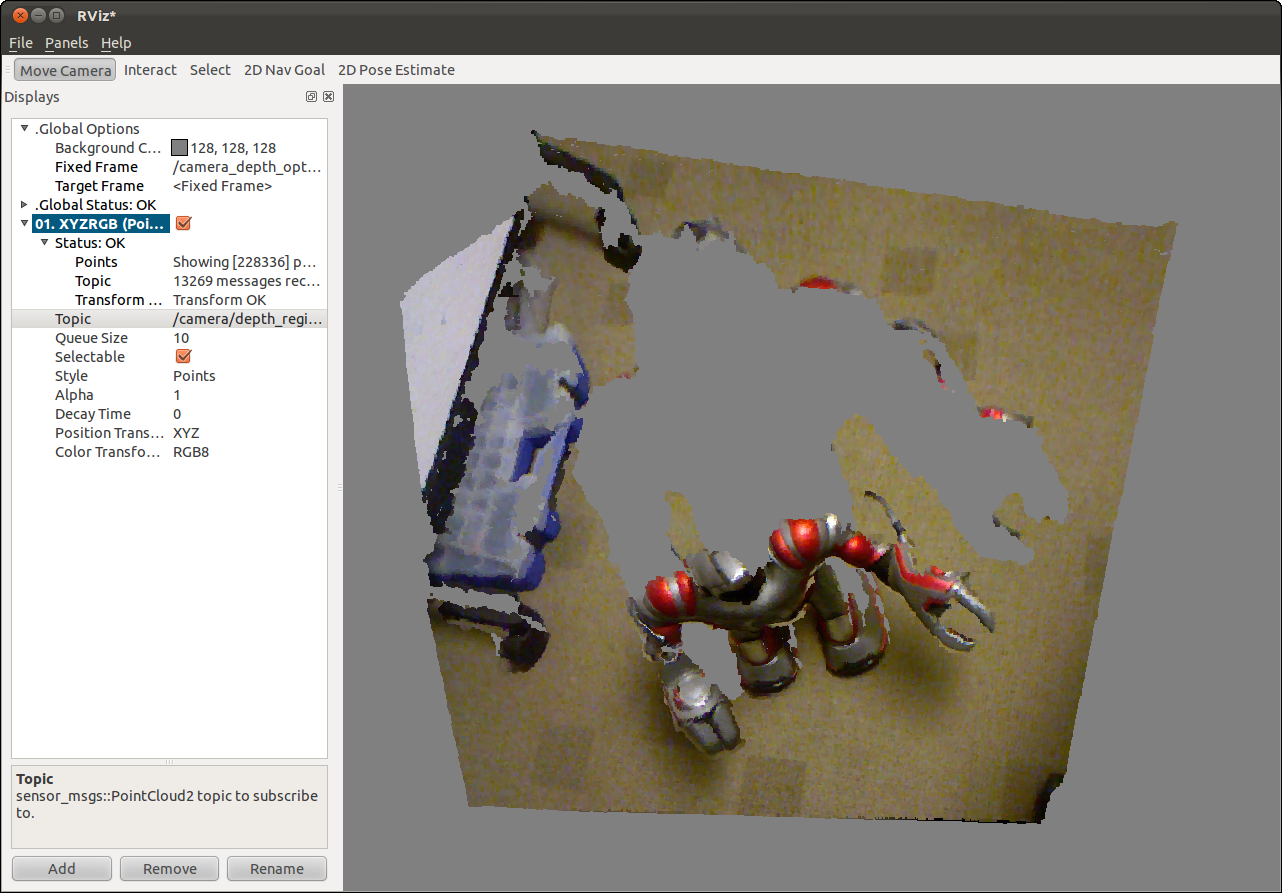
Start rviz and open a PointCloud2 display for topic /camera/depth_registered/points. Set the Fixed Frame to /camera_depth_optical_frame. You should see a lovely color point cloud.

You can compare with OpenNI registration by enabling it as shown in the Quick Start guide.


