| Note: This tutorial assumes that you have completed the previous tutorials: Understanding ROS services and parameters. |
| |
Using rqt_console and roslaunch
Description: This tutorial introduces ROS using rqt_console and rqt_logger_level for debugging and roslaunch for starting many nodes at once. If you use ROS fuerte or ealier distros where rqt isn't fully available, please see this page with this page that uses old rx based tools.Tutorial Level: BEGINNER
Next Tutorial: Using rosed
Contents
Prerequisites rqt and turtlesim package
The tutorial uses both the rqt and turtlesim packages. To do this tutorial, please install both packages, if you have not yet done so.
$ sudo apt-get install ros-<distro>-rqt ros-<distro>-rqt-common-plugins ros-<distro>-turtlesim
Replace <distro> with the name of your ROS distribution (e.g. hydro, groovy, electric, fuerte).
NOTE: you may have already built rqt and turtlesim for one of the previous tutorials. If you are not sure, installing them again will not hurt anything.
Using rqt_console and rqt_logger_level
rqt_console attaches to ROS's logging framework to display output from nodes. rqt_logger_level allows us to change the verbosity level (DEBUG, WARN, INFO, and ERROR) of nodes as they run.
Now let's look at the turtlesim output in rqt_console and switch logger levels in rqt_logger_level as we use turtlesim. Before we start the turtlesim, in two new terminals start rqt_console and rqt_logger_level:
$ rosrun rqt_console rqt_console
$ rosrun rqt_logger_level rqt_logger_level
You will see two windows popup:
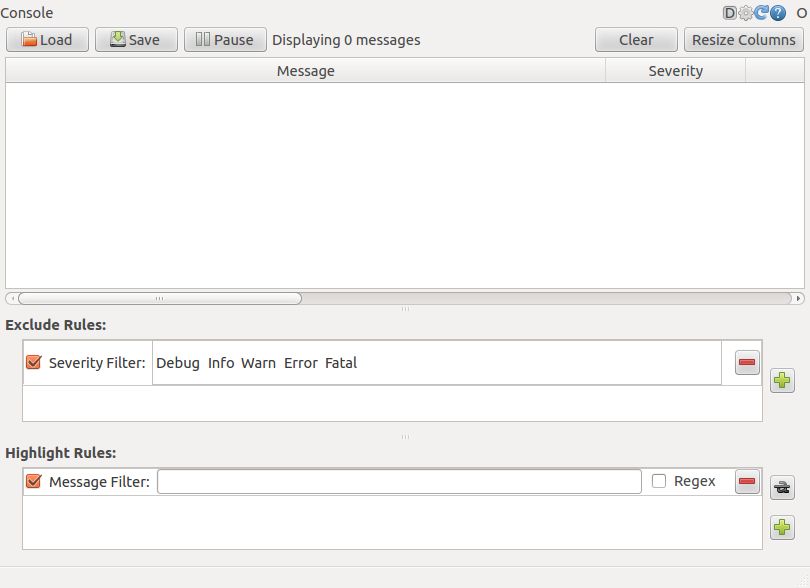

Now let's start turtlesim in a new terminal:
$ rosrun turtlesim turtlesim_node
Since the default logger level is INFO you will see any info that the turtlesim publishes when it starts up, which should look like:
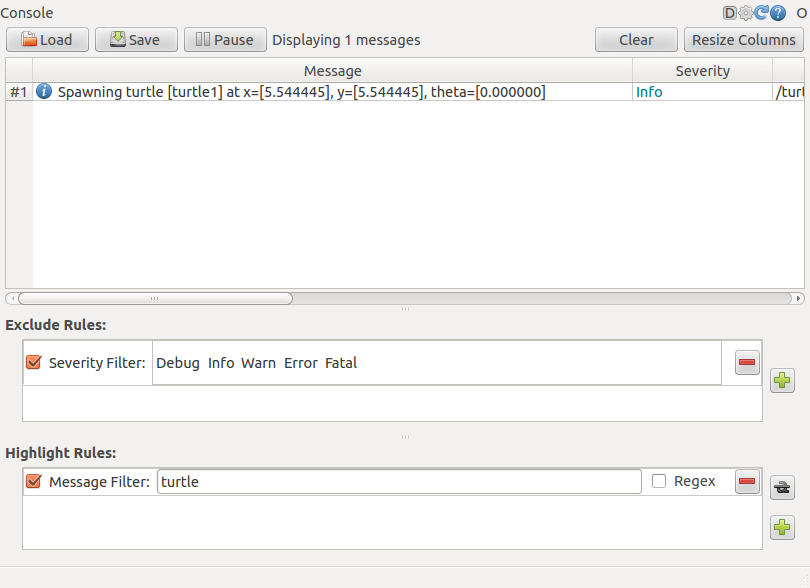
Now let's change the logger level to Warn by refreshing the nodes in the rqt_logger_level window and selecting Warn as shown below:

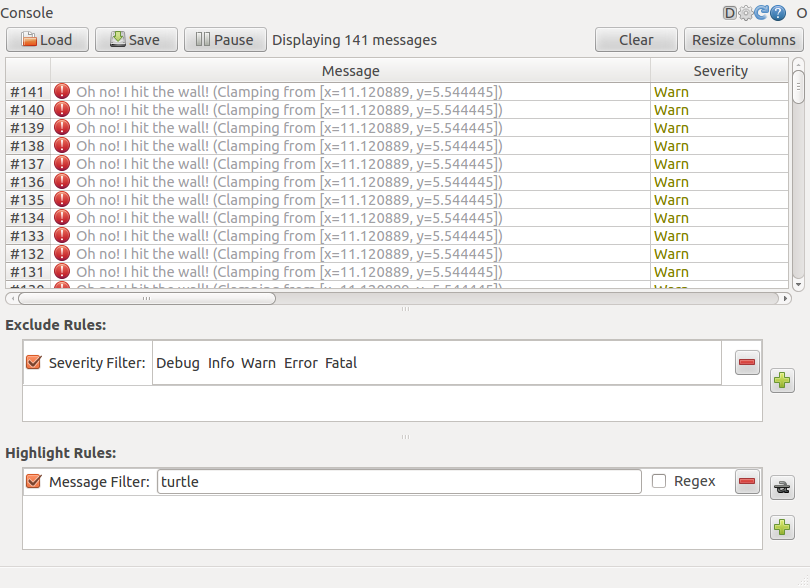
Now let's run our turtle into the wall and see what is displayed in our rqt_console:
For ROS Hydro and later,
rostopic pub /turtle1/cmd_vel geometry_msgs/Twist -r 1 -- '[2.0, 0.0, 0.0]' '[0.0, 0.0, 0.0]'
For ROS Groovy and earlier,
rostopic pub /turtle1/command_velocity turtlesim/Velocity -r 1 -- 2.0 0.0
Quick Note about logger levels
Logging levels are prioritized in the following order:
Fatal
Error
Warn
Info
Debug
Fatal has the highest priority and Debug has the lowest. By setting the logger level, you will get all messages of that priority level or higher. For example, by setting the level to Warn, you will get all Warn, Error, and Fatal logging messages.
Let's Ctrl-C our turtlesim and let's use roslaunch to bring up multiple turtlesim nodes and a mimicking node to cause one turtlesim to mimic another:
Using roslaunch
roslaunch starts nodes as defined in a launch file.
Usage:
$ roslaunch [package] [filename.launch]
First go to the beginner_tutorials package we created and built earlier:
$ roscd beginner_tutorials
If roscd says similar to roscd: No such package/stack 'beginner_tutorials' , you will need to source the environment setup file like you did at the end of the create_a_workspace tutorial:
$ cd ~/catkin_ws
$ source devel/setup.bash
$ roscd beginner_tutorials
Then let's make a launch directory:
$ mkdir launch
$ cd launch
The Launch File
Now let's create a launch file called turtlemimic.launch and paste the following:
   1 <launch>
   2
   3   <group ns="turtlesim1">
   4     <node pkg="turtlesim" name="sim" type="turtlesim_node"/>
   5   </group>
   6
   7   <group ns="turtlesim2">
   8     <node pkg="turtlesim" name="sim" type="turtlesim_node"/>
   9   </group>
  10
  11   <node pkg="turtlesim" name="mimic" type="mimic">
  12     <remap from="input" to="turtlesim1/turtle1"/>
  13     <remap from="output" to="turtlesim2/turtle1"/>
  14   </node>
  15
  16 </launch>
The Launch File Explained
Now, let's break the launch xml down.
1 <launch>
Here we start the launch file with the launch tag, so that the file is identified as a launch file.
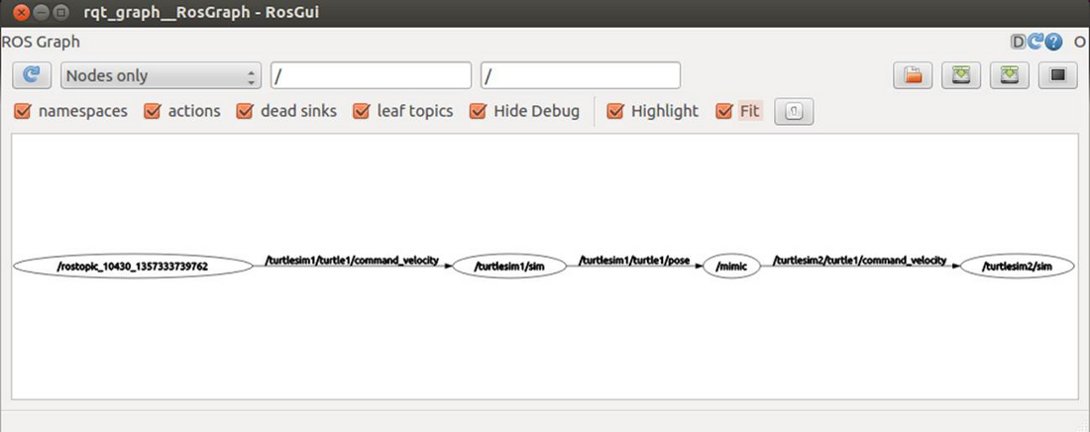
Here we start two groups with a namespace tag of turtlesim1 and turtlesim2 with a turtlesim node with a name of sim. This allows us to start two simulators without having name conflicts.
Here we start the mimic node with the topics input and output renamed to turtlesim1 and turtlesim2. This renaming will cause turtlesim2 to mimic turtlesim1.
16 </launch>
This closes the xml tag for the launch file.
roslaunching
Now let's roslaunch the launch file:
$ roslaunch beginner_tutorials turtlemimic.launch
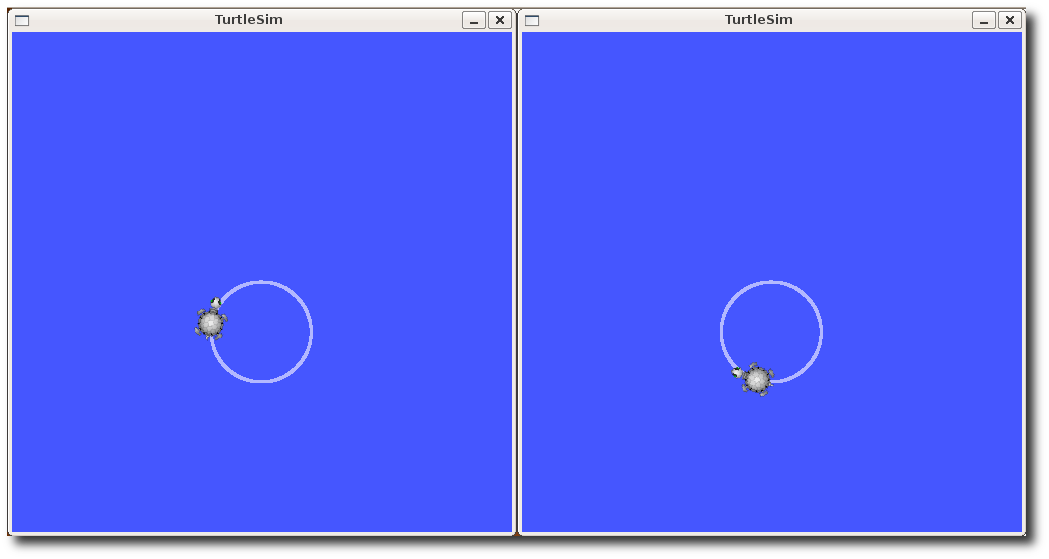
Two turtlesims will start and in a new terminal send the rostopic command:
For ROS Hydro and later,
$ rostopic pub /turtlesim1/turtle1/cmd_vel geometry_msgs/Twist -r 1 -- '[2.0, 0.0, 0.0]' '[0.0, 0.0, -1.8]'
For ROS Groovy and earlier,
$ rostopic pub /turtlesim1/turtle1/command_velocity turtlesim/Velocity -r 1 -- 2.0 -1.8
You will see the two turtlesims start moving even though the publish command is only being sent to turtlesim1.
We can also use rqt_graph to better understand what our launch file did. Run rqt's main window and select rqt_graph:
$ rqt
Or simply:
$ rqt_graph
Now that you have successfully used rqt_console and roslaunch, let's learn about editor options for ROS. You can Crtl-C all your turtlesims, as you will not need them for the next tutorials.


